Diy Manicures Made Easy: Essential Nail Tools For Success
DIY manicures have become extremely popular in recent years, allowing people to get salon-quality nails at home for a fraction of the cost. According to data from Data Intelo, the growing popularity of do-it-yourself manicures is fueling the expansion of the nail care products market. With a few simple tools and some practice, you can give yourself a pristine manicure from the comfort of your home that looks like it came straight from the nail salon.
The key advantages of DIY manicures include saving money, convenience, and control over nail art and colors. You can do them on your own schedule, avoid the time sink of appointments, and have access to your supplies whenever you want to freshen up or change your nails. The pandemic contributed to the rise in popularity as nail salons were closed and people took nail care into their own hands. Now many have realized that with the right tools, DIY manicures can yield polished, professional-looking results.
Basic Nail Tools
Having the right basic nail tools is essential for achieving a professional-looking DIY manicure. The core tools include a nail file, nail clippers, and cuticle remover.
Nail File
A nail file is used to shape and smooth the edges of the nails. Look for a file made of high-quality material such as crystal, ceramic, or metal as they tend to last longer and work better than cheap emery boards. The file should have a fine grit of 150/180 for fingernails. Use the file to gently shape the nails and smooth any rough edges. Filing in one direction helps prevent splits.
Nail Clippers
Invest in a good pair of nail clippers designed specifically for fingernails. Look for clippers with curved blades to follow the natural shape of the nails. Before clipping, soften the nails by soaking them in warm water. Trim the nails straight across to avoid ingrown edges. The nails should be trimmed and filed every couple of weeks to maintain a neat appearance.
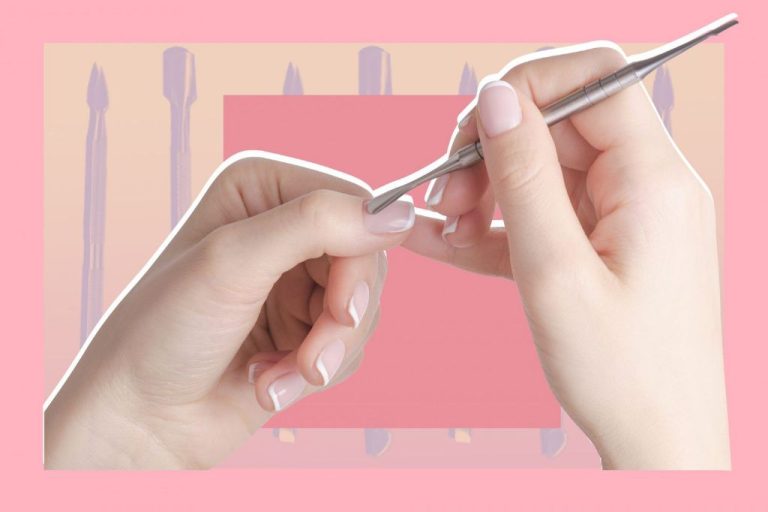
Cuticle Remover
Using a cuticle remover helps tidy up the nail bed for a clean finish. Look for a cuticle remover containing oils and emollients to soften and dissolve dead cuticle skin. Apply it carefully around the base and sides of the nails, gently pushing back the cuticles. The dead skin can then be removed safely and easily with a cuticle pusher and cuticle nippers.
Nail Buffers
Nail buffers are an essential tool for achieving smooth, shiny nails before applying polish. There are a few main types of nail buffers:
- Multi-sided blocks – These have differing grits on each side, usually ranging from coarse/rough to fine/smooth. Using the rougher grits helps shape the nails, while the finer grits refine them.
- Shine buffers – These are very fine grit buffers made specifically for adding shine to already smoothed nails.
- Electric nail buffers – These use power to rotate the buffers and make buffing easier.
To use a multi-sided block buffer properly: Start with the coarsest grit and use circular motions to smooth ridges and shape nails. Move to finer grits, using lighter pressure, to refine the nails. Finish with the finest grit until nails have a glossy shine. Buffing too hard or skipping grits can damage nails, so go slowly and gently.
Shine buffers and electric buffers can be used after shaping with a multi-sided block to really make nails gleam before polish. Always buff gently and avoid overheating nails with electric buffers.
Base and Top Coats
Base and top coats serve important purposes in DIY manicures. Applying a base coat helps protect nails from staining and damage. Base coats also help nail polish adhere to the nail better and last longer without chipping. When doing your own manicure, it’s highly recommended to start with a base coat. Look for a base coat that is formulated to nourish nails and condition cuticles. Popular ingredients in quality base coats include vitamin E, vitamin B5, and keratin.
After applying color, it’s essential to finish with a top coat. Top coats help lock in color and provide a glossy, finished look to your DIY mani. A good top coat will also prevent nail polish from chipping or fading too quickly. Top coats can be regular clear gloss finishes or may contain additional benefits like quick-drying formulas. For extra durability, look for a top coat that contains strengthening ingredients like calcium, vitamins, or acrylic. Applying a quality base and top coat will help your at-home manicure look salon-perfect and last longer between polish changes.
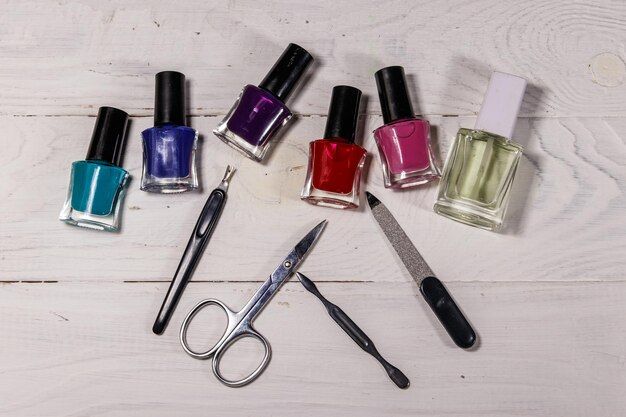
Nail Polish
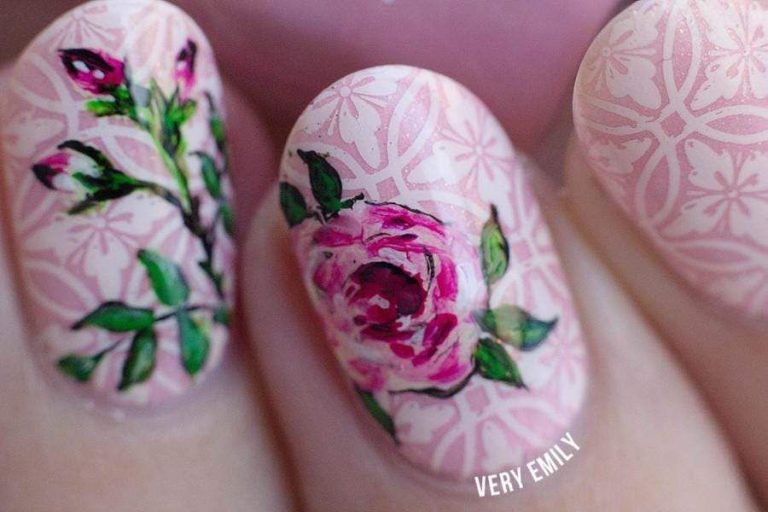
When it comes to nail polish, popular brands include OPI, Essie, and Sally Hansen [1]. These brands offer a wide variety of trendy colors as well as timeless classics like nudes, pinks, and reds. Some popular nail polish techniques include ombre, where you blend two colors together on the nail for a gradient effect, and nail art using striping tape, dotting tools, or decals to create fun designs.
For the perfect at-home manicure, make sure to apply a thin first coat of nail polish down the center of the nail, followed by a second coat from cuticle to tip [2]. Allow each coat to dry completely before moving on. Using a fast-drying top coat will help set the manicure and add an extra layer of shine. When applying darker colors like blacks, blues, and purples, use a base coat first to prevent staining.
Nail Art Supplies
Nail art has become incredibly popular, allowing you to get creative and express your personality through your manicure. While you can find some nail art supplies at a drug store, you’ll have access to a wider selection at beauty supply stores or online. Here are some of the most essential nail art tools for beginners:
Dotting tools allow you to paint small dots and other shapes onto your nails. They come in different sizes, so you can make tiny polka dots or larger floral designs. Get a set with multiple tips for maximum versatility (https://www.lemon8-app.com/discover/Essential%20Nail%20Art%20Supplies%20for%20Beginners?region=us).
Striping tape lets you create straight lines and geometric patterns. The trick is to place it on your nail before painting over it. Once the polish dries, gently remove the tape to reveal perfect stripes and shapes. Buy a pack with tapes in different widths.
Glitter adds sparkle and dimension to any manicure. Use a top coat specifically formulated for glitter to help it adhere. When working with chunkier glitters, use a dabbing motion to press them into the polish. Rhinestones and other nail decals are also fun. Use a steady hand and tweezers when applying them.
With just a few essential art supplies, you can unleash your creativity and take your DIY manicures to the next level. Have fun trying dots, stripes, glitter, and more!
Cuticle Oils
Cuticle oils are an essential part of any DIY manicure routine. Applying cuticle oil helps keep your cuticles soft and your nails strong. According to DIY Cuticle Oil Recipe to Nourish Dry Nails and Cuticles, oils like castor oil and camellia oil are great for nourishing dry nails and cuticles.
Some benefits of using cuticle oil include:
- Hydrates and softens cuticles
- Prevents hangnails
- Strengthens weak or brittle nails
- Stimulates nail growth
- Adds shine and luster to nails
When applying cuticle oil, simply use the applicator or your finger to spread a few drops along each cuticle. Gently massage in with circular motions. For best results, apply cuticle oil once or twice per day such as after washing hands or finishing a manicure. Consistently using cuticle oil will lead to noticeable improvements in the look and feel of your nails and cuticles over time.
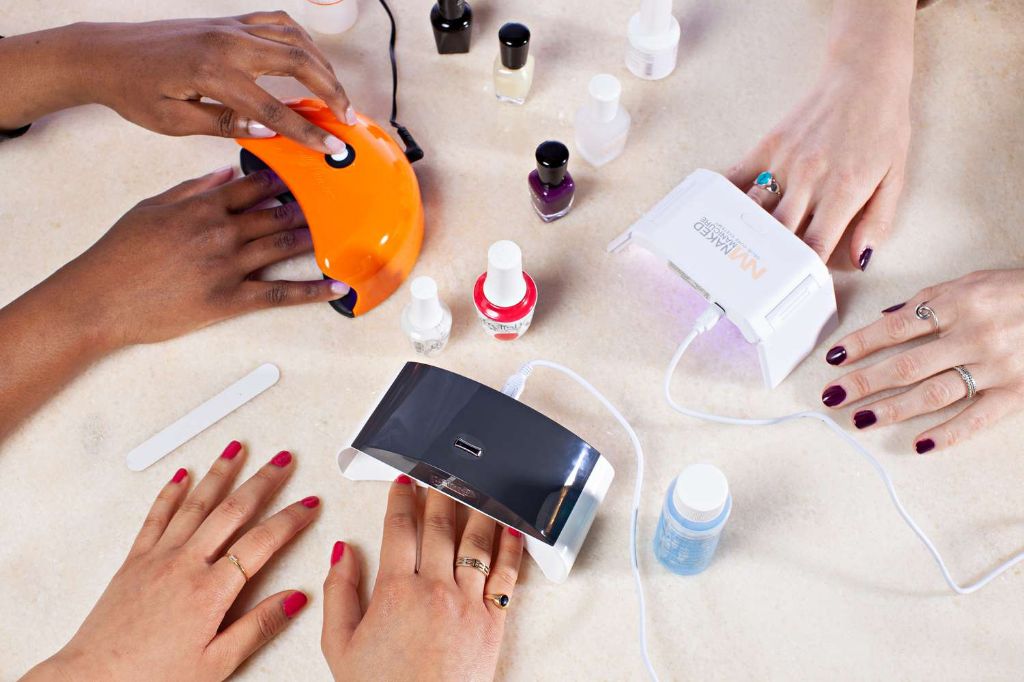
Nail Drying Devices
Drying your nails quickly and completely after a DIY manicure is crucial for a long-lasting, chip-free look. Nail polish that isn’t fully dried can end up dented or smudged if you use your hands too soon. While you can air dry your nails, it can take up to 30 minutes or longer for the polish to fully set. Using a nail drying device speeds up the process considerably.
There are several types of nail dryers to choose from:
- LED nail lamps – These use LED bulbs to emit UV light and dry polish in 30 seconds or less. Most models have timers and adjustable settings.
- UV nail lamps – UV lamps work the same way as LED lamps but use traditional UV bulbs. Drying times are similar.
- Fan nail dryers – These use a small fan to blow air across your nails to hasten drying time. Drying takes 2-5 minutes.
- Spray nail dryers – Spray dryers mist nails with a light polymer formula to set the polish within 60 seconds.
LED and UV lamps offer the fastest drying, but can be pricier than other options. Fan dryers are inexpensive, portable, and work reasonably fast. Spray dryers are quick and easy to use but some don’t like the feel or added layer on top of the polish.
Whichever type you choose, nail drying devices allow you to get a salon-quality manicure at home without the hassle of waiting for your nails to dry. With practice, you can achieve beautiful nails that rival the pros.
Nail Care Tips
Avoiding chips and smudges in your DIY manicure requires some simple tips and tricks. First, always apply a quality top coat like Seche Vite (https://www.seche.com/products/top-coat) to seal and protect the manicure. Let each layer of polish dry completely before moving on. Use thin coats of polish and wrap the tips to prevent chips. Stay away from water and chemicals like cleaning products right after a manicure, since they can cause smudging and damage. Wear gloves when washing dishes or cleaning to keep manicures chip-free longer.
To strengthen nails, apply a nourishing nail oil like Burt’s Bees Lemon Butter Cuticle Cream (https://www.burtsbees.com/product/lemon-butter-cuticle-cream/792850909755.html) daily. Biotin supplements can also help with nail strength and growth over time. Use a glass nail file instead of metal, which can weaken nails. Avoid excessive buffing and filing. Always moisturize hands and nails after washing. Consider nail strengthening polishes that contain ingredients like calcium, vitamins, and proteins. Avoid harsh removers with acetone, as they dry out nails. With some simple care, it’s easy to maintain strong, beautiful nails at home.
Conclusion
In summary, the essential tools for a DIY manicure include nail buffers, base and top coats, nail polish, nail art supplies, cuticle oils, nail drying devices, and proper nail care. With a quality nail buffer, you can shape and smooth your nails before polish application. Base and top coats help the manicure last longer and protect your nails. Nail polish comes in endless colors and finishes to match your style. Nail art supplies like striping tape, rhinestones, and decals elevate your manicure. Massaging in cuticle oil keeps your cuticles hydrated. Nail drying devices like LED lamps cure the polish quickly. Proper nail care involves keeping your nails clean and moisturized. With these key tools and tips, you can achieve beautiful, long-lasting DIY manicures at home.