Nail Tools For Beginners: Essential Supplies For Nail Enthusiasts
Nail art has become increasingly popular as a creative hobby and form of self-expression. From music icons like Rihanna to Olympic athletes like Rebecca Adlington, painted nails have entered the mainstream. This article will serve as a guide for beginners looking to get started with nail art and provide an overview of the essential tools and supplies.
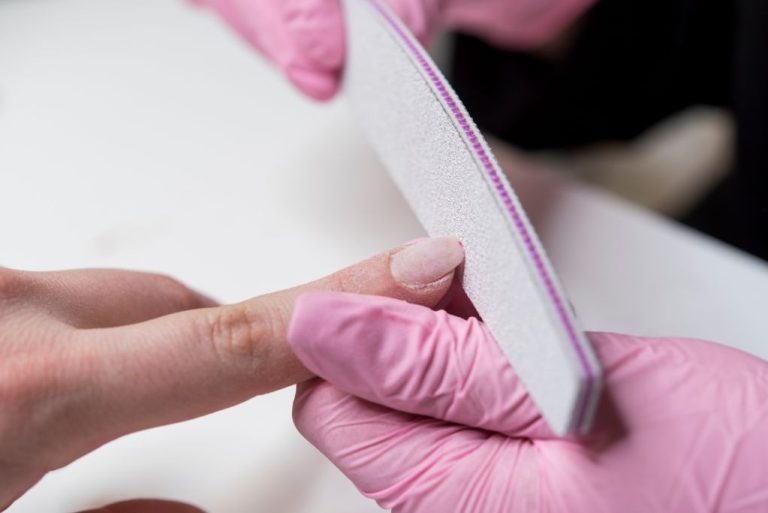
Nail Files and Buffers
Nail files and buffers are essential tools for shaping and smoothing nails. Choosing the right nail file is important, as the grit and material affect how coarse or fine it files. There are three main types of nail files:
- Metal nail files – These have a high grit of 150. The coarse grit means they file nails quickly, so are good for major shaping. However, the coarseness can damage nails if used too aggressively.
- Glass nail files – Glass files have a grit of 100-180. They usually have a fine grit that prevents damage to nails. The fine glass grit gives an smooth finish.
- Cardboard nail files – Cardboard nail files range from grits of 150 to 240. Lower grits file faster, while higher grits give a finer finish. Cardboard files are inexpensive but wear out fastest.
Using a buffer block after filing gives nails a polished, shiny look. Buffers are made of foam or fabric. It’s important to buff nails gently and avoid overheating them, which can weaken nails.
Nail Clippers
Nail clippers are an essential tool for properly trimming and maintaining fingernails and toenails. There are a few different types of nail clippers to consider:
Straight edge nail clippers are good for most fingernails. They have straight blades that cut nails straight across.
Curved nail clippers have curved blades that follow the natural contour of fingernails for shaping them. They give a precise, even cut.
Toenail clippers are designed larger to accommodate thick toenails. Some have wide jaws or straight edges while others have curved blades.
Fingernail clippers are typically smaller with sharper blades. Look for ones made of stainless steel that will stay sharp.
When shopping for nail clippers, look for quality construction with sharp, precise blades. Make sure they fit well in your hand for comfort and control.
Cuticle Tools
Keeping cuticles trimmed and pushed back is vital for neat-looking nails. Cuticle tools include three key products to maintain your cuticles: cuticle nippers, cuticle scissors, and cuticle pushers. Let’s take a closer look at each.
Cuticle nippers are small, scissor-like tools used to trim back overgrown cuticles. They work similarly to nail clippers but are designed just for cuticles. Look for nippers with rounded, smooth edges that won’t tear or snag the skin. Stainless steel nippers like the Seki Edge Professional Nail Nipper are sharp and durable.
Next, cuticle scissors have small, pointed blades to trim hangnails or excess cuticle growth. Opt for sharp scissors like Revlon Precision Cuticle Scissors to cut close without damaging the nail bed. The pointed tips allow precise control.
Finally, cuticle pushers or sticks gently nudge back the cuticle around the nail and remove debris. Choose metal, glass, or wooden pushers with a scooped end. Apply cuticle oil or remover and gently work the pusher around each nail to reveal more of your nail plate over time.
Nail Brushes
Nail brushes are essential for creating intricate nail art designs and achieving a clean, professional manicure. Two types of brushes that every nail enthusiast should have are detail brushes and cleanup brushes.
Detail brushes have a fine tip that allows you to paint on small, precise designs like flowers or polka dots. According to nail art experts at Madam Glam, detail brushes “allow complete control and accuracy for detail work” (https://www.madamglam.com/collections/professional-nail-brushes). Look for brushes with synthetic bristles and a fine point.
Cleanup brushes have a thin, angled shape that enables you to tidy up the edges of your polish or correct mistakes. As noted on Amazon, cleanup brushes “allow you to perfect the application for a salon quality manicure” (https://www.amazon.com/Nail-Brushes/b?ie=UTF8&node=11063531). Choose a brush with firm, synthetic bristles in a size that feels comfortable for detailed work.
Investing in quality detail and cleanup brushes will give you the tools to take your nails to the next level. With practice and the right brushes, you’ll be nail art pro in no time.
Dotting Tools
Dotting tools, also called dotters, are essential supplies for creating different nail art designs like polka dots, stripes, and more intricate patterns. Dotters come in different head sizes, usually ranging from 0.5mm to 2.0mm, allowing you to make tiny detailed dots or larger spots for backgrounds.
The most common dotters have a metal ball tip on one end and a grip handle on the other. High quality dotting tools have smoothly polished metal ends to help pick up and release nail polish easily. Budget sets may have plastic tips which don’t work as well.
Look for dotters sold in sets with multiple tip sizes, like this affordable dotting tool kit. Having different sized tips will allow you to create sophisticated designs. You can also find dotters with a brush on the opposite end for striping.
When using dotters, dip the metal tip into your chosen nail polish color and then gently touch the tip to your nail where you want the dot. Twist the dotter to release the polish. Build up designs by making dots in different sizes and colors. Clean the tips regularly with nail polish remover so polish doesn’t dry on.
With practice, you’ll be able to create stunning polka dot nails, animal print designs, mandala patterns, and other creative looks using dotting tools!
Stamping Supplies
Nail stamping has become an increasingly popular technique for creating fun nail art designs. To get started with stamping, there are a few key supplies you’ll need:
- Stamper – This is the tool used to transfer images from the stamping plate to your nail. Stampers are made of soft, silicone material and have a rounded end that picks up the polish. Many sets come with multiple stampers in different sizes and opacities (see https://www.lanternandwren.com/nail-stamping-tools/).
- Scraper – A metal card used to scrape excess polish off the stamping plate before picking up the image with the stamper. The scraper allows you to get a clean image.
- Stamping plates – These contain etched images that become visible when polished is scraped over top. Plates come in many patterns and designs like florals, geometrics, and more (see selection at https://www.amazon.com/Beavorty-silicone-manicure-stamping-Templates/dp/B0C5P95KV3).
With this basic stamping kit, you’ll be ready to create intricate nail art!
Nail Tips
Nail tips are artificial extensions that adhere to the end of natural nails to extend length or create a desired shape. They come in various materials like acrylic, gel, or plastic. Some popular types of nail tips include:
- Full cover tips – Cover the entire nail from cuticle to free edge
- Half cover tips – Only cover half of the nail’s free edge
- French tips – Pre-shaped tips with a white free edge
- Natural tips – Clear or nude colored versions
- Creative tips – Fun shapes like coffin, ballerina, or stiletto
To apply nail tips, start by shaping the natural nail and removing any oils with nail prep solution. Select a tip that fits each nail shape and lightly file the inside curve so it hugs the nail bed. Apply nail glue sparingly inside the tip and firmly press onto the nail, avoiding the cuticle area. Once secured, trim any excess tip length as desired. Shape and buff the tips until smooth and even with the natural nails. Finish by applying activator and primer before adding acrylic, gel, or dip powder to reinforce and decorate the tips.
Nail tips allow endless options for lengthening nails or trying new styles. With proper prep and application, they can last 1-2 weeks for a professional, long-lasting manicure.
Sources:
https://www.allure.com/story/how-to-apply-fake-nails
Nail Forms
Nail forms are a must-have tool for acrylic or gel manicures. They are thin, flexible paper or plastic sheets that are applied under the natural nail to help sculpt and shape artificial nail enhancements. Here are some things to know about working with nail forms:
Types of Nail Forms
There are a few main options when it comes to nail form types:
- Paper forms – These are thin sheets of paper that are easy to trim and customize for each nail.
- Plastic forms – More durable than paper, plastic forms can be reused a few times if cleaned properly.
- Curve forms – Designed to better fit the natural curvature of each nail.
- Half forms – Only cover half the nail, best for short nail enhancements.
- French forms – Have a built-in smile line for easy French manicure application.
How to Use Nail Forms
Using forms takes some practice, but here are the basic steps:
- Select the right size form for each nail and customize the shape if needed.
- Remove the plastic backing and adhere the form underneath the free edge of the natural nail.
- Gently push back and seal the cuticle area with the form.
- Apply primer, then brush on layers of acrylic or gel over the form.
- Once it’s cured, peel off the form carefully starting at the free edge.
- Shape and finish the enhancement as desired.
With the right forms and technique, you can achieve a flawless, professional manicure. It just takes a little practice!
Conclusion
To recap, the essential starter kit for nail enthusiasts includes items like nail files and buffers, nail clippers, cuticle tools, nail brushes, dotting tools, stamping supplies, nail tips, and nail forms. By starting with high-quality basics like these, beginners can safely practice fundamental nail techniques. As skills improve over time with practice, more advanced tools can be added to the kit.
The key is to start simple, be patient with yourself as you learn, and build up a collection of supplies slowly. Proper use of tools comes with experience. A thoughtfully curated starter set allows you to dip your toes in the water before diving headfirst into elaborate nail art and design.
With the right starter kit, enthusiasm for nails can blossom into a fun and relaxing hobby. The essential tools covered here provide newbies with everything they need to get their feet wet with basic techniques. As a beginner, don’t get overwhelmed with expansive kits or fancy options. Start simple and let your skills and passion guide you on your nail journey.