Flare Nails: Exploring The Unique And Eye-Catching Shape
Flare nails, also sometimes called fan nails, are a unique and eye-catching nail shape characterized by a wider, flared tip that extends outward from the nail bed. Unlike pointed shapes like stilettos or squared shapes like squovals, flare nails have a distinctive silhouette that is thicker and more rounded at the free edge. This flare shape is a current popular trend in nail art and salon manicures.
The key defining characteristic of flare nails is the wider, flared shape of the nail tip. Rather than coming to a point or straight edge, the nails extend outwards into a rounded, fan-like shape. This gives flare nails a very distinctive look that stands out from other common nail shapes like ovals or squares. When shaped and filed properly, the flare shape catches the light for an eye-catching accent nail or full set. Flare nails are a fun, on-trend way to experiment with a non-traditional nail shape.
History and Origin
Flare nails, also known as “duck nails”, first emerged as a trend in the early 2000s. According to this article, they were possibly inspired by the reality TV show Jerseylicious and gained popularity in 2012 under the name “flared nails”. The trend is believed to have originated among Italian-American communities before spreading more widely.
Flare nails were notably sported by Nicole “Snooki” Polizzi, Mike “The Situation” Sorrentino and other cast members on the MTV reality show Jersey Shore in the late 2000s and early 2010s. Snooki in particular was known for her long, embellished flare nails. The distinctive nail shape was a signature look for her and contributed to popularizing the trend during the height of the show’s popularity.
The early 2010s saw flare nails gain traction in mainstream nail culture. However, the bold look fell out of fashion later in the decade. The style recently reemerged on social media, experiencing a revival among Generation Z users on TikTok and Instagram who have put a modern spin on the vintage trend.
Shapes and Proportions
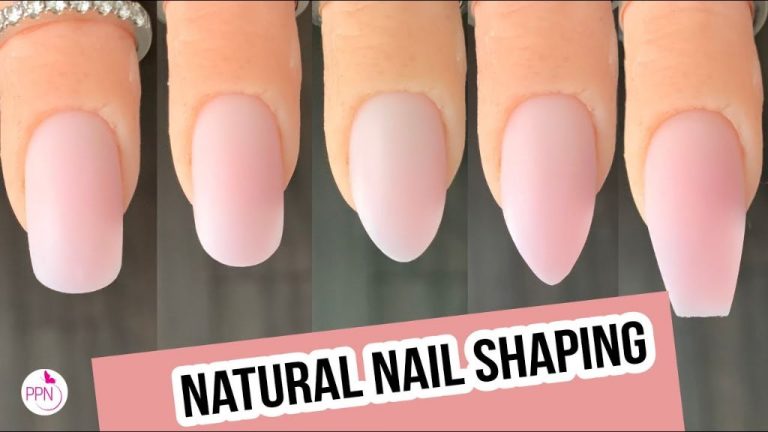
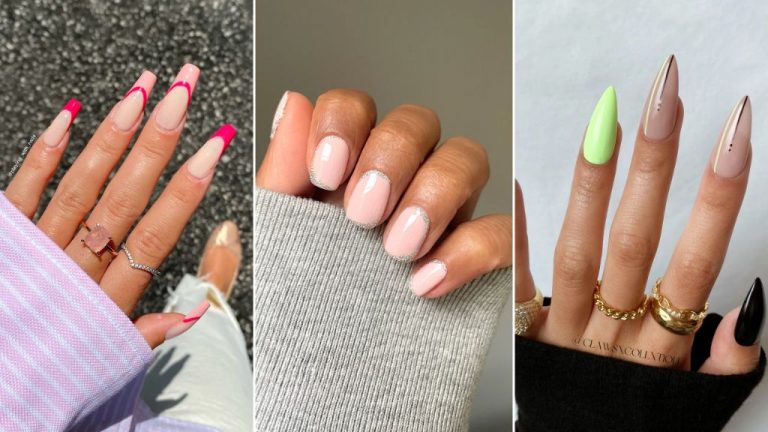
Flare nails come in a variety of shapes to suit different preferences and nail lengths (Allure). The most common flare nail shapes include:
- Almond – A rounded tip that comes to a slight point. Almond flare nails help elongate the fingers.
- Ballerina – A tapered square shape and rounded corners.
- Coffin – A square nail with straight sides that extend just past the fingertip.
- Round – A rounded tip with curved sides. This shape looks great on shorter nails.
The flare nail’s signature feature is the dramatic curve and width at the base of the nail bed. The ideal flare has an obvious curve about 2/3 of the way down the nail, so the width at the base is 1.5-2x the width at the tip (Pinterest). The curve should ideally begin right where the nail emerges from the cuticle for maximum impact.
When choosing flare nail lengths and shapes, the proportions are key. Overly long flares risk appearing droopy or heavy. Aim for a length about 1.5x the width of your natural nails. Shorter nails can opt for a rounder shape, while longer nails suit an almond or coffin shape to help balance out the proportions (Allure).
Art and Design Options
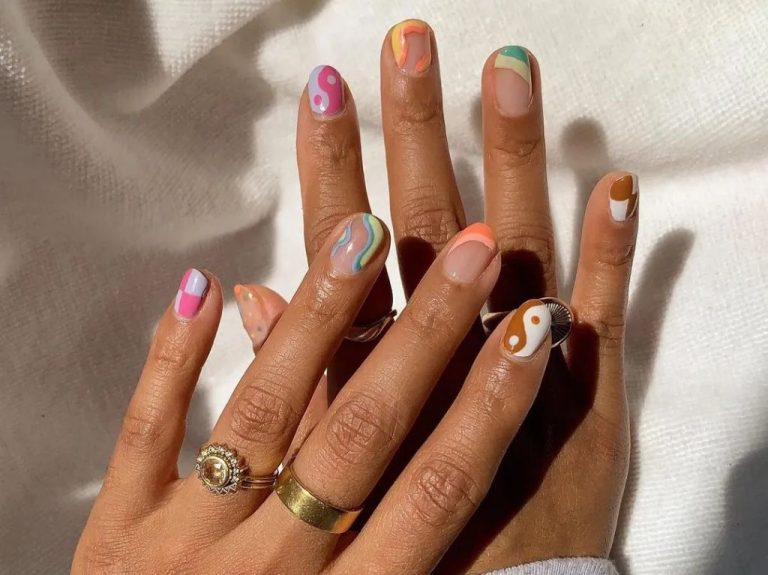
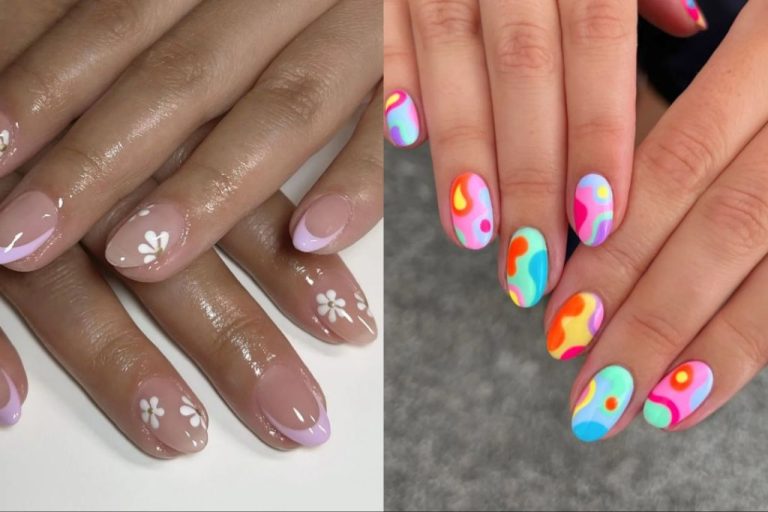
Flare nails allow for endless creativity when it comes to nail art and design. The exaggerated shape lends itself beautifully to elaborate decorations and embellishments. Here are some popular ways to decorate flare nails:
Colors – Given their length and prominence, flare nails are the perfect canvas for using bright, bold colors. Vibrant shades of red, blue, purple and others really stand out. gradients and color blocking between multiple fingers are also popular.
Patterns – The broad surface area of flares allows room play with graphic prints, lines, dots, flowers, lace, animal prints and more intricate patters. Water-marble, stamping and hand-painted designs work well.
Rhinestones – A classic way to glam up flare nails is by adding sparkle with rhinestones. Large singular stones, clusters and lines of rhinestones all complement the shape.
Glitter – For some shimmer and shine, different glitter styles like chunks, fine grounds and shimmery powders can be incorporated as accents or overall coverage.
Some current popular nail art trends for flare nails include abstract shapes, maximalist mosaics, metallic chrome, pearl accents, negative space, jewel tones and minimalist French tips (source). The options are endless for customizing these statement-making nails.
Best Practices for Application
When it comes to applying flare nails, precision and patience are key. Here are some tips from experienced manicurists on getting the shape and proportions right:
Start with clean, filed natural nails. Nails should be filed into a squoval or square shape before applying tips. This provides a strong base for building out the flare shape.
Use a nail tip that is slightly wider than the natural nail bed. The tip should extend just past the edges of the natural nail. Apply the tip carefully, making sure it sits flush against the free edge.
Shape and define the smile line. Use a coarse file to taper the tip outward into a subtle point. Don’t file too aggressively; smooth shaping is better for avoiding breaks.
Use acrylic or gel and a thin brush to build out the flare shape. Apply product in light layers, curing in between. The key is to create an even curve on both sides of the nail tip.
Finish with gentle filing and buffing to perfect the shape. Look at the nail from all angles to ensure symmetry. Avoid over-filing the edges too thin.
Products like forms, nail tips, and curved files specially designed for flares can help achieve a professional look. Working on one nail at a time and taking steps slowly gives best results.
Maintenance Tips
Keeping flare nails looking tidy in between appointments is key to maintaining a polished look. Here are some tips for prevent breaks, chips, and growth:
Use cuticle oil daily to keep the nail bed hydrated and prevent cracks and peeling. Massage a drop of oil into each cuticle 1-2 times per day. Jojoba, vitamin E, and botanical oils are great options.
Apply a clear topcoat regularly to protect the design underneath. Reapply every 2-3 days or when the shine starts to fade. Topcoats help prevent chipping and extend the life of your manicure (https://www.aad.org/public/diseases/psoriasis/skin-care/nail-care).
Wear gloves for wet work like washing dishes, cleaning, or gardening. The moisture can weaken nails and cause them to break. Vinyl gloves are ideal.
Use a glass nail file to gently shape nails as they grow out. Metal nail files can cause splits and cracks. File in one direction, moving from the outside of the nail towards the center.
Avoid nail polish removers with acetone, as these can dry out the nails. Use an acetone-free formula.
Get fills every 2-3 weeks to maintain the shape and prevent lifting or cracking as the natural nails grow. Scheduling regular appointments is key for flare nail upkeep.
See your nail technician right away if you notice any lifting, cracks, breaks or other damage so they can be repaired quickly.
Cost Considerations
Getting professional flare nail services can be pricey depending on where you go and what extras you get. According to How Much Do Acrylic Nails Cost? Your Ultimate Price Guide, the starting price for a basic full set of acrylic nails ranges from $30 to $35 at a mid-tier salon. However, flare nail shapes often cost more than a basic square or round shape. You can expect to pay $40-60 for a full set of acrylic flare nails from a professional.
Factors like nail art, length, salon location, and nail tech experience level can raise the price. Designs like marble, glitter, or drawings cost $5-15 more per nail. Going longer than your natural nail length adds $5-10 per set. Big city salons or highly skilled nail techs charge premium rates. All these extras can quickly push the total cost over $100.
If you want to DIY flare nails at home, you can save a lot of money. Home acrylic kits cost $25-50 and include supplies for several sets. You may spend $15-25 more on flare nail tips for the specific shape. While professional results take practice, you can get salon-worthy flair nails at a fraction of the cost.
Pros and Cons
Flare nails have both advantages and potential drawbacks to consider before getting them done. Here are the main pros and cons:
Advantages of Choosing Flare Nails
Some of the benefits of flare nail shapes include:
- Make short or wide nail beds appear longer and thinner (Source)
- Give a clean, elegant look
- Well-suited for shorter nail lengths
- Create the illusion of an oval nail shape
- Allow more creativity with nail art due to the flared tip
Drawbacks and Challenges
Some potential downsides of flare nails:
- May not suit long nail lengths as well
- Can be prone to cracking or breaking at the thinner edges
- Require more maintenance to keep the edges filed properly
- Artificial flare tips may lift off more easily than other shapes
- Less durability than square or squoval shapes
Flare Nails vs. Other Nail Shapes
Flare nails have some key differences compared to other popular nail shapes like almond, coffin, and square (Source). While all these shapes have a slightly pointed tip, flare nails have a more dramatic slope on the sides that curves up to the tip. This gives flare nails a very unique look.
Compared to almond nails, flare nails have a more exaggerated pointed tip and a sharper curve up the sides. Almond nails tend to have a subtler tip and slope (Source). Coffin and ballerina nails have a straighter edge on the sides versus the rounded flare shape.
In terms of wearability, flare nails’ dramatic pointed tips may make them more prone to breaking or snagging than sturdier shapes like squoval or square nails. However, the swooping curve on the sides helps add strength compared to skinny stiletto nails. The flare shape works well on most nail lengths and hand shapes when applied properly.
Overall, flare nails offer a eye-catching look that stands out from other popular nail shapes. Their exaggerated pointed tip and swooped sides create a unique profile that makes a statement.
Conclusion
Flare nails offer a bold, eye-catching look that stands out from other nail shapes. As we’ve discussed, the flared-out shape creates the illusion of longer, more elegant nails while still allowing for intricate art and designs. The extended nail edge also allows for more dramatic shapes like the “stiletto” flare.
While flare nails aren’t suitable for every lifestyle or work environment, they offer a fun way to express your personal style. The unique silhouette shapes the fingers in an elegant way. Flare nails certainly draw attention and compliments. For those seeking a manicure that is artistic and unusual, flare nails deliver visual impact.
If done properly by a skilled nail technician, flare nails can safely extend your natural nails for weeks of durable wear. The eye-catching shape stands out while allowing you to showcase your favorite colors, patterns, jewels, and more. While high maintenance, flare nails reward dedication with a truly showstopping manicure.