Mastering Nail Art: Essential Tools For Creative Designs
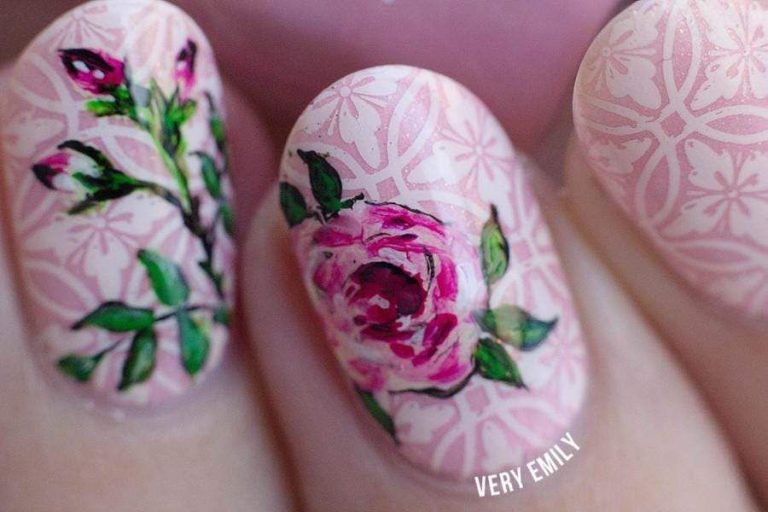
Nail art has exploded in popularity in recent years as a fun and creative way to express one’s style. It involves using various tools and techniques to decorate fingernails and toenails with designs, patterns, colors, glitters, jewels, and more. From simple polish colors to intricate hand-painted works of art, nail art allows endless possibilities for creativity.
Nail art first emerged as a trend in the 1980s and has continued to gain momentum ever since. With the rise of nail salons, YouTube tutorials, Instagram, and nail art contests, there are more opportunities than ever for nail artists to share and showcase their skills. Advancements in nail polish formulas, acrylics, gel polishes, and an ever-expanding array of nail art tools have further fueled this trend.
Mastering nail art requires some specialized supplies beyond regular nail polish. This article will provide an overview of the essential tools needed to take your nail designs to the next level.
Basic Nail Art Tools
Nail polish is the core essential for any nail art design. Having a range of nail polish colors and finishes allows you to get creative with different looks. Nail polish comes in creams, shimmers, metallics, neons and more. Build up a diverse collection of colors and have fun mixing them to invent custom shades. It’s best to stick to quality salon nail polish brands like OPI and Essie that offer rich pigmentation and lasting wear.
A good top coat is also a must-have. Top coats help seal and protect your nail art, while also adding a glossy finish. They smooth out any ridges and help prevent chipping. Apply a fast-drying top coat as the final step after your design is complete. Seche Vite and Essie Gel Setter are top choices for their quick dry time.
Using a base coat underneath your nail polish is highly recommended too. Base coats prime and prep the nails, allowing polish to glide on easier. They prevent staining of the nails from pigments. Base coats also help prolong the life of your manicure by preventing early chipping and peeling. Apply just one thin layer before starting your nail art.
Nail Art Brushes
Nail art brushes are essential tools for creating intricate designs on nails. There are several types of brushes tailored for different techniques.
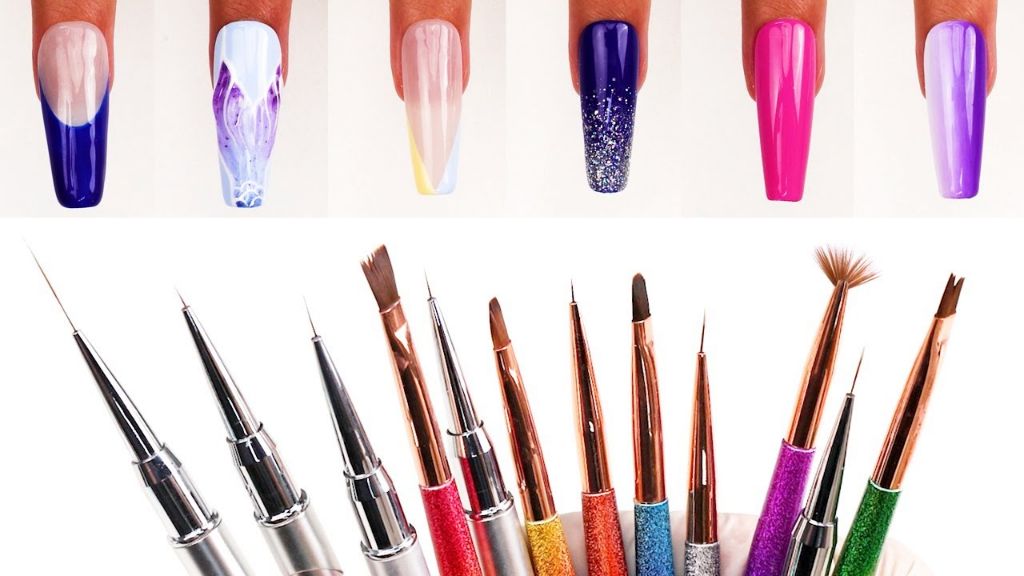
Detail brushes have a fine tip that allows you to paint tiny designs like flowers, dots, and lines. These thin brushes give you precision and control for nail art.
Striping brushes are longer with a fine pointed tip used for creating straight lines and stripes. The stiff bristles provide stability when drawing stripes or French tips.
Fan brushes have an angular shape, resembling a fan. They are ideal for dusting on glitter or making feathered effects. The wide shape covers more surface area at once.
It’s helpful to have a variety of nail art brushes. Different sizes and shapes allow you to achieve diverse design effects. Investing in quality brushes helps create pro-looking nail art.
Dotting Tools
Dotting tools are small metal rods with round ball tips on the end used to create small, precise dots for patterns and designs. Two common types of dotting tools include metal and silicone dotters.
Metal dotting tools are made of stainless steel or brass. The ball tips come in a range of sizes, usually ranging from 0.5mm to 2.5mm in diameter. Metal dotters allow for very precise dotting and have a smooth glide across the nail. However, the hard metal tip can sometimes damage or indent the nail polish if too much pressure is applied.
Silicone dotting tools are made of flexible, rubbery silicone material. The silicone tips are softer and create a more diffused dot. Silicone tools are gentler on the nails. However, the dots may not have as crisp of edges compared to metal dotters. Silicone tools are better for beginners before moving onto metal dotters which require a lighter touch.
Both metal and silicone dotting tools are essential supplies for creative nail art designs. Most kits include an assortment of different sized tips to allow for intricate dot work patterns. This guide provides a comprehensive overview of the role dotting tools play in nail art and design.
Striping Tape
Striping tape is a fun tool to create straight lines and geometric patterns in nail art designs. Striping tape comes in a variety of materials like vinyl, glitter, holographic, and more. It also comes in different widths like thin pinstripes or wide tapes.
According to an article on Beauty Big Bang, “Roll the tape out of the nail and gently press it. Use a nail scissors to cut the tape to where you want the tape to end.” This allows you to create clean stripes on the nail that can be built up into chevron, polka dot, zigzag, and other geometric patterns (source).
Striping tape allows beginners to nail art to create intricate designs easily. You can layer colors and textures with striping tape to make unique manicures. It’s an inexpensive tool that opens up many creative possibilities.
Stencils
Stencils are templates that create a pattern or design on your nails when nail polish is applied over them. They come in two main forms: premade stencils you can purchase, or DIY stencils you make yourself.
Premade Stencils
Premade stencils offer a wide variety of intricate designs to choose from. They are typically made from plastic, metal, or perforated paper, with the desired pattern cut out. To use a premade stencil, place it over the nail, apply nail polish over the stencil openings with a brush, then carefully remove the stencil to reveal the pattern. Premade stencils make it easy to achieve complex designs like floral patterns, geometric shapes, and animal prints.
DIY Stencils
You can also create custom stencils at home using simple materials like tape, stickers, hole punches, or a craft knife and transparency sheets. DIY stencils allow you to make your own unique designs. Cut or punch out your desired pattern from tape, stickers, or transparency film. Then place the DIY stencil on your nails and apply polish over it. DIY stencils give you creative control to make any stencil pattern you can imagine.
Stamping Plates and Stampers
Stamping is a fun nail art technique that allows you to create intricate designs on your nails using image plates, a stamper, and polish. Here’s what you need to get started:
Image plates are thin metal plates that have designs etched into them, usuallynature motifs, geometric patterns, or fun icons. You apply polish to the plate, scrape off the excess, and use a stamper to transfer the design to your nail. Plates come in sets with a range of patterns to choose from.
The stamper is a tool made of rubber or silicone that picks up the polish from the etched design on the plate and transfers it to your nail in one easy press. Stampers come in different shapes like round, square, or wide flat for full nail images.
A scraper can be a flat piece of cardboard or a purpose made scraper. You use it to gently scrape off any excess polish from the plate so only the etched design is coated before picking it up with the stamper.
Together these nail stamping tools allow you to quickly add creative, eye-catching designs on your nails with polish. It just takes some practice to get the technique down!
Gels and Polymer Clay
Gel polishes have become a popular nail art tool thanks to their durability and long-lasting shine. Gels come in an array of colors and finishes, making them versatile for creative designs. Once cured under a UV or LED lamp, gel polish hardens on the nail for up to three weeks of chip-free wear. Using gels allows you to achieve layering and blending effects that aren’t possible with regular nail polish.
Polymer clay is another unique material for nail art. Polymer clay can be easily shaped and molded before baking to harden it. Common polymer clay techniques for nails include making small flowers, bows, and decorative elements that can be attached to the nail with glue. Polymer clay adheres well to nail tips and allows for intricate hand-sculpted 3D designs. An advantage of polymer clay is that it can be painted with regular nail polish after baking for coloring effects. As this source explains, polymer clay works effectively with gel polishes for creating nail art: Polymer Clay Nail Art – Madam Glam UV Gel Polish
Glitters and Rhinestones
Glitters and rhinestones can add sparkle and dimension to nail art designs. They are fun finishing touches that can take a manicure from simple to stunning. Here are some tips for working with glitters and rhinestones:
Glitter polishes add shimmer and shine to nails. They come in a variety of colors and sizes of glitter. For full coverage, apply two to three coats, allowing each coat to dry between applications. Top with a topcoat like Seche Vite to smooth and seal in the glitter.
Rhinestones can be purchased in various sizes and shapes to create dazzling designs. Use a small dotting tool or tweezers to pick up individual rhinestones and place them onto nail polish or nail glue on the nails. For extra adherence, cure the nails under an LED or UV lamp after applying the rhinestones.
Adhesive flakes contain small pieces of glitter held together with a sticky backing. Cut flakes into pieces and apply to the nail where desired. Gently press down to ensure they adhere properly.
For stunning sparkle, combine glitter polish, rhinestones, and adhesive flakes together. Add stripes of glitter polish, place rhinestones strategically as accents, and fill in gaps with flakes. The options are endless!
With the right glitters, rhinestones, and technique, you can create show-stopping nail looks. Dazzle on your next manicure with these fun finishing touches.
Conclusion
In summary, nail art is an incredibly fun and creative way to express yourself through manicures. From simple designs using basic tools like nail polish and dotting tools, to advanced techniques like stamping and 3D acrylic nails, the possibilities are endless. The key tools covered in this article, like quality brushes, rhinestones, glitters, and stamping supplies, open up a whole world of nail art options.
Looking through nail art photos can provide lots of inspiration for your next stylish manicure. While it does take practice to get comfortable using some of the more advanced nail art techniques, don’t be afraid to start simple and work your way up as your skills improve. Nail art is meant to be enjoyable, so have fun with it! With a passion for creativity and the right essential tools, anyone can become a nail art master.