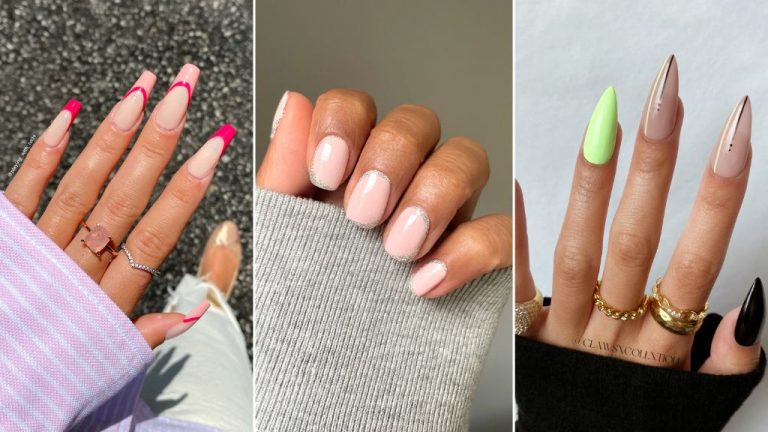
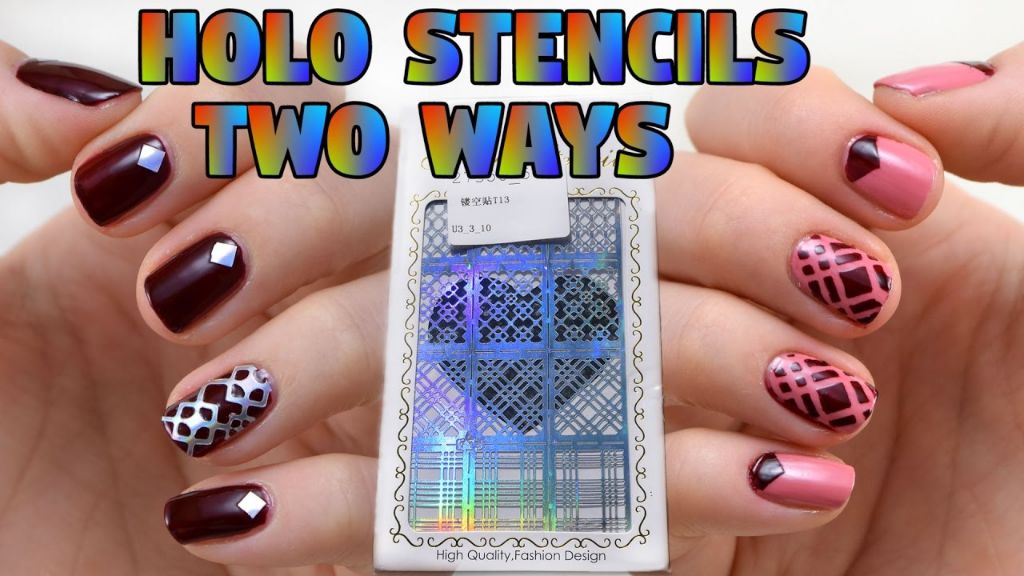
Nail Art With A Stencil: Easy & Precise Designs For Beginners
Nail art stenciling is a technique that involves using a pre-cut stencil to create designs on your nails. It offers an easy and precise way for beginners to create intricate nail art looks that would normally require advanced freehand skills.
Stencils come in a variety of patterns and can be placed on the nail before applying polish or acrylic paint within the cutout areas. This achieves an accurate, consistent design every time. Compared to freehand nail art, using a stencil limits room for error and gives beginners beautiful salon-worthy results.
The precision of stencils allows you to get creative and make any design from simple patterns to complex motifs. Even someone with no artistic experience can make amazing nail art!
Benefits of Using Stencils
Using stencils for nail art provides several advantages over freehand designs:
Stencils allow you to achieve much more precise and intricate designs than is possible with freehand nail art. The stencil acts as a guide, ensuring perfectly straight lines, sharp edges, and an overall clean look that is difficult to accomplish freehand, especially for beginners.
Stencils also make it easy to recreate the same design multiple times. Once you have a stencil, you can use it again and again to achieve the same results every time. This makes stencils great for when you find a design you love and want to be able to recreate it perfectly.
Applying nail art with a stencil is faster than painting freehand. You can quickly place the stencil and fill it in, cutting down on nail art application time. This makes stencils ideal when you want an eye-catching manicure but don’t have a lot of time to spend on intricate freehand designs.
Overall, stencils provide precision, consistency, and time savings when creating nail art. They are an excellent tool for beginners looking to create salon-worthy designs at home without much practice or artistic skill required.
Stencil Materials
Nail stencils come in a variety of materials, each with their own pros and cons:
Plastic: Plastic stencils are affordable and easy to find. They are flexible so they can conform to the nail shape. However, they may not last as long with repeated use as other materials (Source).
Metal: Metal nail stencils are very durable for repeated use. They allow for precise, intricate designs. But they can be more expensive and are not as flexible to conform to nails (Source).
Vinyl: Vinyl is lightweight and cheap but can tear more easily. It sticks well to nails without sliding. The designs may not be as detailed as metal or reusable stencils.
Cardboard: Cardboard stencils are the cheapest option but are one-time use. They work for simple designs and are easy to throw away after.
Consider the nail design, budget, and how often you’ll use the stencils when deciding on a material. Reusable stencils are best for frequent use while cardboard or plastic work well for an occasional manicure.
Choosing Stencil Designs
When selecting a stencil design, consider your skill level as a beginner and choose simpler patterns to start. Geometric shapes like circles, triangles, and lines are beginner-friendly. Florals with large, open flowers are also easy for novices.
Holiday themes make for fun stencil designs. Christmas trees, shamrocks for St. Patrick’s Day, or flags for the 4th of July are great options. Words and short phrases also work well with stencils.
As you gain more experience, you can attempt more intricate stencil patterns. But simple designs are quick, achievable, and can look just as stylish for nail art newcomers. Focus on precision when starting out rather than super complex stencils.
Here are some ideas for easy stencil designs for beginners:
- Polka dots
- Chevron stripes
- Mini hearts
- Stars or moons
- Arrows
- Flowers like daisies, roses, or tulips
- Snowflakes in winter
- Your initials or a short word like “Love”
Browse stencil sets online or in craft stores for inspiration. Look for variety packs with multiple simple options to choose from.
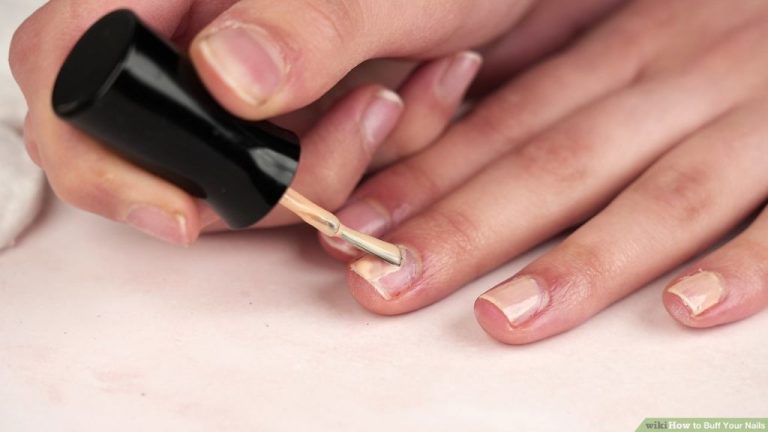
Prepping Nails
Properly preparing your nails is a critical first step before applying stencils. Start by shaping and cleaning your nails. Use a nail file to shape your nails into a uniform length and shape. Make sure the edges are smooth so the stencil can lay flat against your nail. Push back and trim your cuticles with a cuticle pusher and nail clipper to expose the entire nail surface. Then, wash your hands thoroughly with soap and water and use a nail brush to scrub away any oil and residue. This helps the stencil adhere better.
Next, apply a base coat to create a smooth foundation for the stencil design. Choose a nourishing base coat that will hydrate your nails. Apply a thin, even layer on each nail, making sure to cap the tips. Let the base coat dry completely before moving onto the next step. The base coat will help the stencil stick to your nails better and prevent stains from nail polish seeping underneath the stencil.
With your nails now prepped and ready, it’s time to start stenciling!
Applying the Stencil
Properly applying the stencil is crucial for getting a crisp, clean design. Here are some tips for applying stencils:
- Make sure nails are completely dry before applying the stencil. Even a small amount of moisture can make the stencil slide around.
- Position the stencil where you want the design to be. Press down firmly at the center of the stencil, then smooth outward toward the edges to adhere it to the nail. Rubbing the stencil helps activate the adhesive and prevents lifting or shifting (Source).
- Do not move or adjust the stencil once it’s placed. If needed, gently peel it up and reapply. Moving it will likely smudge the design.
- Apply very thin, even coats of polish over the stencil. Thick coats may bleed underneath. Let each coat dry fully before adding another.
- Carefully peel stencil straight up off the nail once polish is dry. Pulling to the side can smudge the design.
Taking care when applying stencils helps create super crisp edges. Avoid smudging by pressing firmly and peeling straight up once dry.
Filling in Stencil
Once the stencil is securely adhered to your nails, you can begin filling it in with polish. When choosing polishes, opaque cream polishes work best. They will completely cover the nail and leave an even, bold color behind. Sheer polishes may still show the nail through the stencil cutouts. Metallic polishes are also great for adding shine and dimension.
Use a thin brush and lightly dab it into the polish to pick up a small amount. Then gently dab the brush onto the stencil, slowly building up color inside the cutouts. Try not to overload the brush or you may seep polish underneath the stencil. Work carefully and methodically. Apply a couple coats to ensure full coverage inside each design.
For added depth, use 2-3 alternating colors to fill in the stencil. Start with the lightest shades first when layering colors. Keep layers thin to prevent polish from flooding underneath the stencil.
Once fully filled in, run a toothpick around the edges of the stencil to tidy up any overflow or smudges.
Removing Stencil
Once you have finished filling in the stencil design with your choice of nail polish, it’s important to let the polish dry completely before attempting to remove the stencil. This will prevent smudging or messing up your nail art. A good rule of thumb is to wait 10-15 minutes for regular nail polish to dry, or cure gel polish under a UV/LED lamp according to polish instructions.
When you are ready to remove the stencil, start peeling slowly from one corner. Don’t rip the stencil off. Gently peel up the stencil, checking to make sure the polish underneath stays put. If you feel resistance, stop and wait a minute or two for the polish to dry further. Keep peeling slowly and carefully until the entire stencil has been removed.
Sometimes polish can stick to the stencil a bit when peeling off. If this happens, use a toothpick to gently scrape off any excess polish stuck to the stencil so it doesn’t get on your nails. Make sure not to scratch your actual nail surface while doing this.
Once the stencil is removed, examine your nail art closely. If there are any small gaps or missing polish, you can easily fix them with a small brush or dotting tool. Then seal your design with a layer of clear top coat to smooth and protect the polish.
Sealing Design
After you have finished filling in the design using your nail polish colors, it is crucial to seal and protect the design by applying a top coat. Choose a fast-drying top coat like Sally Hansen Miracle Gel Top Coat which dries quickly and leaves a shiny, durable finish (https://nailconfidant.com/blogs/news/5-recommended-top-coats-for-nail-polish-wraps). You can also use a gel top coat like DANNI & TONI Glossy Gel Top Coat which provides a glossy look and long-lasting protection (https://www.amazon.com/DANNI-TONI-Glossy-Lasting-Required%EF%BC%89/dp/B09YM5ZG4Q).
Be very careful when applying the top coat not to smudge or drag the polish. Use light, even strokes and work quickly before the polish dries. Make sure to seal the very edges of the design as well. Allow the top coat to dry fully before doing anything with your hands to avoid messing up your design.
Caring for Stenciled Nails
Stenciled nail art can last 1-2 weeks if properly cared for. To help your designs last longer:
- Apply a top coat like Seche Vite over the design to seal and protect it.
- Avoid picking at or peeling the design. This can cause chipping.
- Use cuticle oil daily to keep nail edges hydrated.
- Avoid heavy cleaning or hand sanitizer which can cause cracks in the polish.
- Wear gloves for household chores to prevent chipping.
When your manicure starts showing wear after 1-2 weeks, you can touch it up. Use the original nail stencil and polish colors to fill in any missing pieces or gaps in the design. This preserves the look without having to fully redo the manicure. With minor touch ups, stenciled designs can last 2-3 weeks total.
Sources:
https://health.howstuffworks.com/skin-care/nail-care/tips/how-to-use-nail-stencils.htm