Nail Shapes For Acrylics: Tips For A Flawless Application
Nail shapes can completely transform the look of your hands. With the rise in popularity of acrylic nails, there are more nail shape options than ever before. This article will provide an overview of the most popular nail shapes for acrylics, as well as tips for choosing the right shape, preparing your nails, applying the acrylics, and maintaining your manicure.
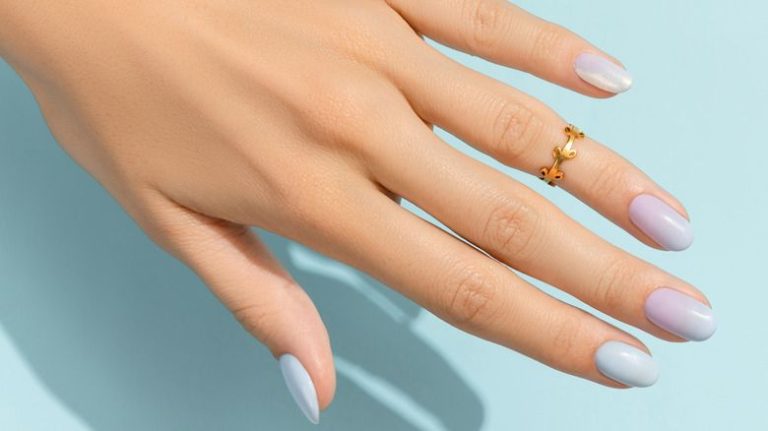
Almond Nails
Almond-shaped nails are an elongating shape with pointed tips and a soft curve on the sides. They have a tapered oval look, resembling the shape of an almond nut. Almond nails are great for elongating shorter nails and making the fingers look longer and slimmer. They look great with nude or pink acrylic powder.
Pros: The pointy shape gives the illusion of length to shorter nails and makes fingers look slim. The soft curve makes them less sharp than pointy stiletto nails. The shape suits most nail beds.
Cons: They aren’t as suited for very short nails since they need length to create the tapered almond shape.
Almond nails look best on nail lengths starting at medium length and longer. The shape showcases longer nails but can also work on short/medium length with a more rounded tip. Almond nails work on most nail shapes given their forgiving oval sides.
When applying almond acrylics:
– Make sure the nail tip is filed into a symmetrical almond point, curving down the sides evenly.
– Avoid overly sharp points.
– Shape the acrylic into a rounded-edge almond, leaving a small margin around the cuticles for strength.
See examples and inspiration for almond acrylic nails here: https://www.pinterest.co.uk/dunne0594/almond-acrylic-nails/
Square
Square acrylic nails are exactly as the name suggests – nails shaped with straight, right angles to create a box-like square shape at the tip. This shape has parallel sides and a flat edge, giving a very symmetrical and clean look.
Square acrylics are one of the most popular nail shapes because they’re very versatile and flattering on most nail beds. The straight edges help make fingers appear longer and give a clean, contemporary look. The sharp corners also allow for precise nail art.
Squares are a great option for those with wider nail beds or shorter nail beds, since the straight edges help balance out proportions. They also work well on short and long nail lengths. However, very long squares can look severe, so medium length is ideal.
To apply square acrylics, focus on filing the edges straight and creating perfect 90 degree angles at the tips. Lightly file the corners to soften them. Then use the edge of the brush to define sharp lines along the sides. Check sides frequently for symmetry.Source
Round
Round shaped acrylic nails are circular at the tip with a curved edge. They create the appearance of natural, healthy nails and are the most common acrylic nail shape
Round acrylics are versatile and flattering on most nail lengths and shapes. The rounded tips are safe for day-to-day activities and low maintenance. This classic shape works well for short, medium, or long nail lengths. The curved edges prevent snagging and breakage.
When applying round acrylic nails, focus on creating a symmetrical, uniform curve across all nails. Lightly file the sides and free edge into a rounded C-curve shape. The center of the nail tip should protrude slightly. Avoid overfiling into a squoval or square shape. Round nails look best with a high arch and side curvature.Source
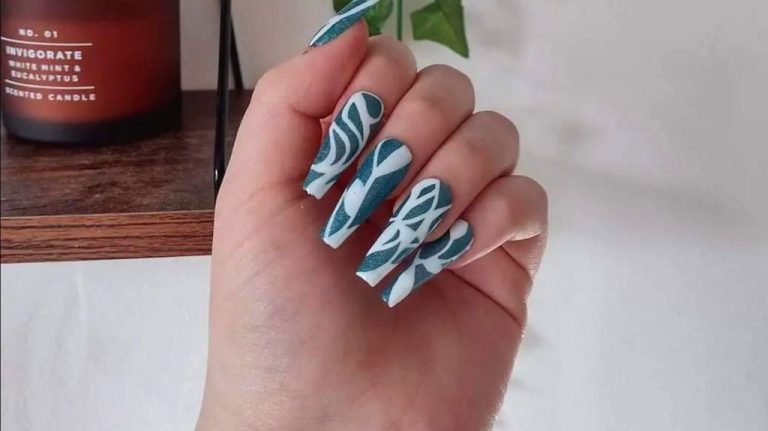
Coffin
Coffin shaped nails, also known as ballerina nails, are long nails with a square top edge and straight sides that give them a coffin-like appearance. Coffin nails are currently one of the most popular acrylic nail shapes.
Description: Coffin nails are versatile and can vary in length from short to extra long. They showcase the nail bed and make the fingers appear elongated and slim. The straight edges give a clean, modern look.
Pros: Coffin nails are stylish and trendy. The elongated shape is flattering for most nail beds. The straight edges don’t catch on things like round nails. Coffin nails draw attention to your hands.
Cons: Long coffin nails may impede functionality of the hands. Shorter coffin shapes don’t have this disadvantage. The straight edges lack the softness of a rounded nail.
Best for: Coffin nails look great on most nail lengths and shapes. They are ideal for medium to long nail beds. Short to long coffin shapes both work well.
Application tips: Ask your nail technician to customize the coffin length and shape for your nails. Make sure the nails don’t extend too far past your fingertips if going for a longer coffin. Get polish applied conservatively near the cuticles to avoid chipping.
According to Coffin Nails Inspiration, coffin acrylics are a popular choice because they are stylish and modern. The elongated look slims and flatters the fingers.
Ballerina/Stiletto
Ballerina nails, also called stiletto nails, are long, tapered nails that look like an elongated nail bed shape (Source: https://www.pinterest.com/bdyrkm/ballerina-nails/). The nails come to a sharp point, mimicking the shape of a ballerina’s shoe. Ballerina nails create an elegant, dramatic look.
Ballerina acrylics are best for people with longer natural nails, as the extension helps create the tapered look. Those with shorter nails may find the nail beds look stubby or too short for the nail tip. Ballerina nails also work best on narrow or oval shaped nail beds rather than wide nail beds (Source: https://www.pinterest.com/bharrison85/ballerina-nails/).
When applying ballerina acrylics, focus on creating a smooth transition from the natural nail to the tip. Lightly file the free edge of the nail bed into a point before application. Use forms to sculpt each nail into a tapered extension. Ballerina nails require meticulous application and shaping to avoid a “bulky” look.
The pros of ballerina nails are they create an elegant, eye-catching look. The con is they are prone to breaking or cracking. Ballerina nails also may not be suitable for manual labor jobs or tasks requiring use of the fingertips. They require extra care to avoid damage.
Choosing Shape
When choosing an acrylic nail shape, there are several factors to consider such as your nail bed length and width, nail strength, and lifestyle activities. Generally, a shorter nail bed looks best with a rounded shape like oval, round, or squoval according to nail experts (https://kesterblack.com.au/blogs/articles/how-to-find-the-most-flattering-nail-shape). A longer nail bed can support more angular shapes like square, almond, or coffin.
Wider nail beds tend to look better with a squoval shape to add length without sharp corners (https://blueskycosmetics.co.uk/blogs/blog/how-to-choose-your-nail-shape). Narrow nails suit pointier styles like almond or stiletto. Weak, brittle nails do best with rounded edges to prevent cracking and breaking.
Lifestyle is also key. Sharp nails chip more easily, so avoid stiletto or coffin shapes if you use your hands frequently. Pick a short rounded shape like round or square if your job requires a lot of typing or manual tasks (https://www.realsimple.com/beauty-fashion/skincare/hands-feet/nail-care/nail-shapes).
Preparing Nails
To achieve a flawless acrylic nail application, proper nail preparation is crucial. The nail bed must be clean, dry and filed to create the ideal surface for acrylic application.
Start by gently pushing back the cuticles with an orangewood stick or cuticle pusher. Do not cut or trim the cuticles as this can lead to infection. Then thoroughly cleanse nails to remove dirt, oil and debris. Soak nails in a mild detergent or antibacterial scrub for 2-3 minutes (hooked-on-nails.com).
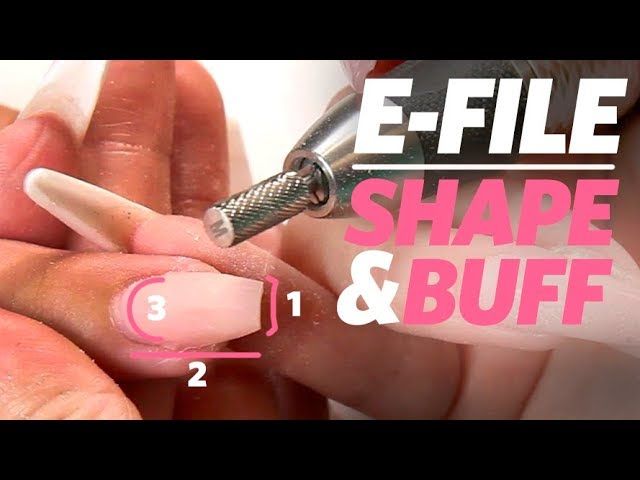
After soaking, use a nail file to shape the free edge and lightly buff the surface of the nails. This removes shine and creates microscopic scratches for acrylic to adhere to. Be careful not to over-file as this can damage the nail bed.
Next, use a nail dehydrator or primer to extract moisture and prep nails. Apply in a thin, even layer and allow to dry completely. Nails should look clean and matte. Proper nail prep creates the ideal canvas for flawless acrylic application.
Applying Acrylic
Follow these key steps for applying acrylic powder and liquid to achieve flawless acrylic nails:
- Prepare the natural nail by gently pushing back the cuticle and removing any shine with a buffer. Be sure the nail is clean and dry before applying acrylic (Tips for Mastering Art of Acrylics).
- Apply primer to the entire nail plate to help the acrylic adhere. Let it dry.
- Apply acrylic liquid to the nail, then dip the brush into the acrylic powder. Tap off any excess powder (Beginner’s Guide to Applying Acrylic Nails).
- Use the brush to apply a small bead of acrylic to the center of the nail. Quickly push it back towards the cuticle area.
- Use the belly of the brush to pat and press the acrylic into place, avoiding getting it on the skin or cuticles.
- Continue applying small beads and patting them down until you achieve your desired nail length and shape.
- Make sure the acrylic is even and there are no lumps. Gently file and buff to perfect the shape.
Avoid overworking the acrylic or applying it too thickly. Take your time and remember less is more for a clean application. Let the acrylic fully dry between coats. Following these application tips will help you achieve flawless, professional looking acrylic nails.
Maintenance
Caring for and maintaining your acrylic nails properly is crucial for keeping them looking beautiful. Here are some tips:
Apply nail oil 1-2 times per day, like jojoba or vitamin E oil, to keep the nails flexible and prevent cracking and breaking, as acrylics can become brittle over time (Source). Gently massage the oil into the nail and cuticle.
Avoid using your nails as tools to pry things open or scrape surfaces, as this can cause lifting and cracks. Treat them gently.
Keep acrylic nails dry and avoid prolonged water exposure. Wear waterproof gloves for tasks like washing dishes, and limit time in the shower (Source).
Follow a regular acrylic nail care routine between salon visits, like gently filing away lifting edges and soaking off residue. Do not over-file the surface.
Maintain the cuticles and skin around the nails by keeping them moisturized and gently pushing back cuticles after softening them.
Use a nourishing cuticle oil daily and apply lotion to hands to prevent irritation and lifting from dry skin.