Stripes & Lines: Fun & Geometric Nail Art Tutorials For Beginners
Geometric nail art is a popular, trendy design that uses shapes like lines, triangles, circles, and squares to create abstract patterns on nails. It’s considered a beginner-friendly nail art style because it relies on simple shapes and stripes that are easy to paint freehand once you get the hang of it.
Geometric designs are graphic, modern, and versatile. You can create simple monochrome designs or vibrant multi-color works of art. The repetitive shapes and lines have a hypnotic, mesmerizing effect. Geometric nail art ranges from minimalist to bold and eye-catching. The geometric trend makes nail art accessible for those new to painting their nails because you don’t need stead hands or precise detailing to create the basic shapes.
Geometric nail designs are fun to create and offer tons of room for creativity and self-expression. Their graphic appeal looks great on nails both short and long. It’s no wonder why geometric nail art continues to be a popular choice for beginners and pros alike.
Supplies Needed
To get started with geometric nail art designs as a beginner, there are just a few basic supplies you’ll need.
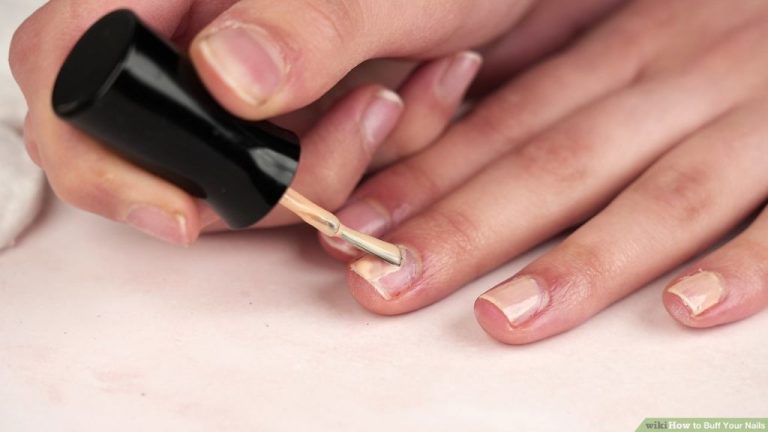
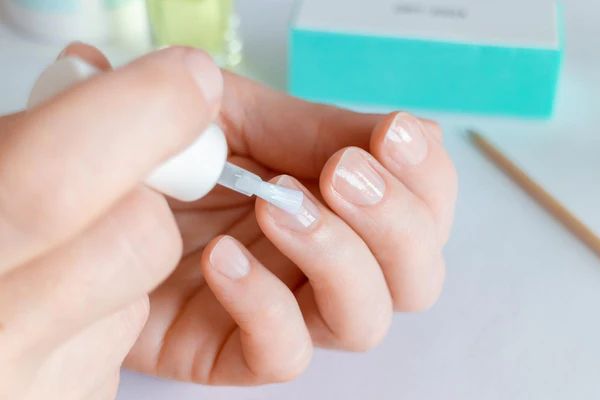
First, be sure to have a good base coat and top coat. A base coat helps the polish adhere to your nails and prevents staining. A top coat seals in your design and gives it a glossy finish. Sonailicious Boutique has quality options for both.
Next, you’ll need nail polish in various colors. Both creams and shimmers can work well. Go with whichever colors inspire your creativity!
Striping tape is essential for clean lines and geometric shapes. An inexpensive roll like Twinkled T’s striping tape is perfect for starting out.
Dotting tools allow you to make uniform polka dots and circles. Begin with a basic 5-piece dotting tool set.
Finally, have pure acetone on hand for easy cleanup and removal of polish when needed. With these supplies, you’ll be ready to create trendy geometric nail designs!
Simple Geometric Shapes
Some of the easiest geometric nail art designs feature simple shapes like lines, triangles, squares, and circles. These basic elements can be used to create eye-catching nail art, even for beginners. Here are some tips for painting basic geometric shapes on your nails:
Lines
Painting straight lines is a great way to add a geometric touch. Use a thin nail art brush and steady hand to create single lines down the center of the nail. For wider lines, repeat the motion side-by-side. Add vertical lines on accent nails for another fun look. Refer to this tutorial for tips on creating clean straight lines: [https://www.naildesigncode.com/linear-nail-art/].
Triangles
Triangles are one of the most versatile geometric shapes for nail art. Paint a triangle at the base of the nail and fill it in for a bold accent. Or, create rows of triangles down the nail in different sizes. Play around with alternating the direction of triangles for geometric designs. See these video tutorials for triangle nail art inspiration: [https://www.youtube.com/watch?v=nuFhwG8LhdI]
Squares
There are many creative ways to incorporate squares into nail art designs. Paint a few stacked squares in the center of an accent nail. Or cover each nail in rows of multi-colored squares for a fun grid pattern. Check out this tutorial for help with getting clean edges on square shapes: [https://www.alllacqueredup.com/2010/06/manicure-tutorial-perfect-squares.html#.YkSyES-l3AV]
Circles
Circles and dots give a playful, polka dot look to nails. Paint different sized circles in a color pattern for a retro mod design. Or, make circle nail art drip down like a rainbow. This video has useful techniques for painting clean circles and dots: [https://www.youtube.com/watch?v=DVCTGEwIotk]
Creating Straight Lines
Drawing perfectly straight lines on your nails can be tricky, but with the right tools, you can get professional-looking results at home. Striping tape is the easiest way to create straight lines on your nails. Simply apply the tape directly onto the nail where you want the line placed, and then paint over it with your chosen nail polish color. Slowly remove the tape to reveal super sharp edges. For thinner, more delicate lines try striping vinyls instead of tape.
Stripe vinyls come in an array of different widths and can be purchased at most beauty supply stores. Apply them the same way you would striping tape, paint over the vinyl, let dry slightly and then carefully peel it off. You can create fun geometric patterns, chevrons or simple parallel lines. Striping brushes are another handy tool that eliminate the need for tape or vinyls. Dip the brush directly into the nail polish, wipe off excess on the rim of the bottle, then use the edge of the brush to “draw” your straight stripe. It may take some practice, but striping brushes give you total control and can achieve very precise lines. Reference: https://www.popcosmo.com/blog/2012/08/24/manicures-how-to-draw-perfectly-straight-lines
Chevron and Zig Zag Patterns
Chevron and zig zag patterns are a fun way to add geometric interest to your nails. They utilize straight lines at repeating angles to create a bold, eye-catching look.
To create chevron nails, paint your base color first. Then, use a thin striping brush and black or contrasting nail polish to paint angled lines across the nail. The key is keeping the lines straight and at an equal angle. Start with lines going up and to the right, then switch to lines going down and to the left to complete the chevron shape.
Zig zags add a similar effect but with sharper turns instead of angles. Use the striping brush to paint a line diagonally up and to the right, then sharply change direction and paint the next line diagonally down and to the left. Continue switching back and forth to complete the zig zag.
Vary the width between lines for different looks. Wider spacing creates bolder shapes, while thinner spacing yields a more delicate, geometric effect. For first-timers, go with what feels comfortable. With practice, you can get creative with skinnier lines and intricate patterns.
Check out this video for a chevron nail tutorial using striping tape for perfect lines: https://www.youtube.com/watch?v=zH6gGji1ZpU
Polka Dots
Polka dots are a fun and easy nail art design that adds a pop of color and whimsy to your manicure. To create this look, you’ll need dotting tools, bobby pins, or a toothpick. Dotting tools allow you to make uniform circles in different sizes, but you can improvise with items around the house if you don’t have them.
Start by applying a base coat to protect your nails. Paint your nails in a solid color of your choice and allow to dry completely. Then, using the smaller end of a dotting tool, bobby pin, or toothpick, dip into a contrasting color nail polish and gently dot it onto your nail where desired. Add dots of varying sizes for dimension. Continue dotting contrasting colors onto each nail until you achieve your desired polka dot design.
Make sure to seal your design with a top coat when finished. This protects the nail art and gives it a glossy polished look. For more inspiration, check out this polka dot nail tutorial. With some practice, you’ll be a pro at creating fun polka dot nails!
Triangles
Triangles are a fun and versatile shape to use in nail art designs. There are a few different types of triangles you can create:
- Equilateral triangle – this is when all three sides of the triangle are equal in length.
- Isosceles triangle – this is when two sides of the triangle are equal in length.
- Right triangle – this is a triangle that contains one 90 degree angle. The side opposite the 90 degree angle is called the hypotenuse.
To create triangle nail art, first prep and base coat your nails. Use a striping brush or toothpick with black nail polish to draw triangles freehand on the nails. Make them different sizes and positions for interest. Try alternating equilateral and isosceles triangles. You can also add other shapes and details like dots in the open spaces.
For triangular tip nails, use nail tape to mask off the shape, then paint the exposed area a contrasting color. Carefully remove the tape to reveal the triangle. This looks great with a glitter tip! Have fun exploring different triangle variations with your nail art.
Checkerboard Patterns
Checkerboard nail art features alternating squares of color in a grid pattern across each nail. To achieve this look, you’ll need a thin brush for precision. Work across the nail in rows, painting in small squares of color side-by-side (cite: https://www.tiktok.com/@tipsandtonic/video/7143334680358669573).
Start with a base coat in one color. Let it dry completely before painting the checkerboard pattern. Use the thin brush to create rows of squares in the second color. Make sure they are evenly sized and spaced. Go back and forth painting the squares until you fill in the grid (cite: https://www.skillshare.com/en/blog/how-to-create-checkered-nails/).
Finish with a topcoat to smooth and seal the design. Consider using tape or nail guides for extra straight lines. Checkerboard nails pair well with any color combo and look great on short or long nails!
Finishing Touches
The final step is to apply a top coat to seal in your design and add a glossy finish. Using a fast-drying top coat like Seche Vite or Essie Gel Setter will help protect your nail art. Apply a thin layer across all nails and let it dry completely. This prevents smudging and locks in the polish.
Don’t forget to moisturize your cuticles after removing the nail polish. An oil like Sally Hansen Cuticle Rehab Oil Pen will rehydrate the skin and nails. Gently massage a drop into each cuticle after taking off your nail polish. This prevents cracking and peeling.
Inspiration for Next Designs
Once you have mastered the basics of geometric nail art, you can start exploring more advanced designs. Check out these ideas for inspiration on where to go next with your nail art skills:
This intricate black and white geometric design combines triangles, lines, and dots for a mesmerizing look. The contrast of the black and white makes the pattern really stand out. Source
Upgrade your chevrons to 3D by using striping tape to create the illusion of raised lines. Pair it with a complementary base color for extra pop. Source
If you love blinky eye art, try transforming it into a geometric pattern by using straight lines instead of curved ones. It creates a really cool spin on this trend. Source
This houndstooth design uses simple squares and rectangles to create a eye-catching black and white pattern. Try it on a single accent nail or full set. Source
Go bold with an all black geometric look. Use glossy black polish and finish with a matte top coat to add dimension. Source