Rihanna’S Fiery Nail Art: Music Video Ready With A Diy Twist
Rihanna is one of the most popular and iconic music artists of the 21st century. Since bursting onto the scene in 2005, the Barbadian singer has become known not only for her chart-topping songs, but also for her bold and trendsetting style. Over the course of her career, Rihanna has sold over 250 million records worldwide, making her one of the best-selling artists of all time (Business Insider). She’s achieved 14 number one singles on the Billboard Hot 100 and earned 9 Grammy Awards along the way (Wikipedia).
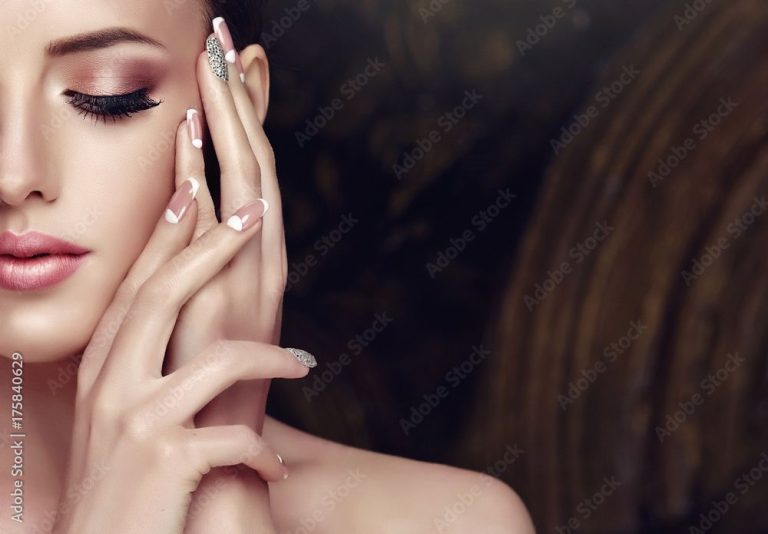
When it comes to fashion and beauty, Rihanna is just as influential. She is constantly pushing boundaries with her daring hairstyles, makeup looks, and nail art designs. Her manicures in particular have become a trademark part of her style. Rihanna helped popularize trends like holographic chrome nails, creative flame designs, and embellished nail art on the red carpet. Her colorful, high-fashion manicures have inspired copycats and DIY tutorials for years.
Rihanna’s Signature Nail Art
Over the course of her career, Rihanna has become known for her bold and cutting-edge nail art looks. She is constantly pushing boundaries and trying new styles that set trends in the celebrity nail art world. According to Nailpro, Rihanna has sported everything from vibrant neons to holographic chrome designs over the years (source). One of her early signature looks featured flames, which she rocked in red at the American Music Awards in 2013. Leopard print nails were another go-to Rihanna manicure back in the day. She gave them an edgy update by pairing them with black graphic tips. More recently, Rihanna has embraced embellished nail art with 3D gems, foils, and ombré. Her evolution of nail styles demonstrates her willingness to take risks and try the latest trends.
Recreating Her Look
Rihanna is known for her bold and creative nail art that perfectly complements her fashionable looks. To recreate some of her signature nail styles at home, there are some key products and techniques you’ll need.
Start with a quality base coat to protect the nails, and opt for a long-lasting nail polish formula in the shades you want. Some of Rihanna’s go-to colors include classic red, metallic gold, and black. According to The Zoe Report, Rihanna recently rocked “black flame” nails featuring dark polish and graphic details.
Nail art pens, glitter polishes, and decals can all help recreate Rihanna’s embellished designs. Use pens to draw flames, leopard spots, or other graphics. Outline designs with metallic polishes or add ombré color gradients. Her manicurist often uses Swarovski crystals to embellish select nails.
Top coat is key for sealing in designs and adding shine. Finish the nails with a layer of quick-dry top coat, like Seche Vite or Essie Gel Couture Top Coat. Setting sprays can also help keep nail art intact for music video shoots or nights out.
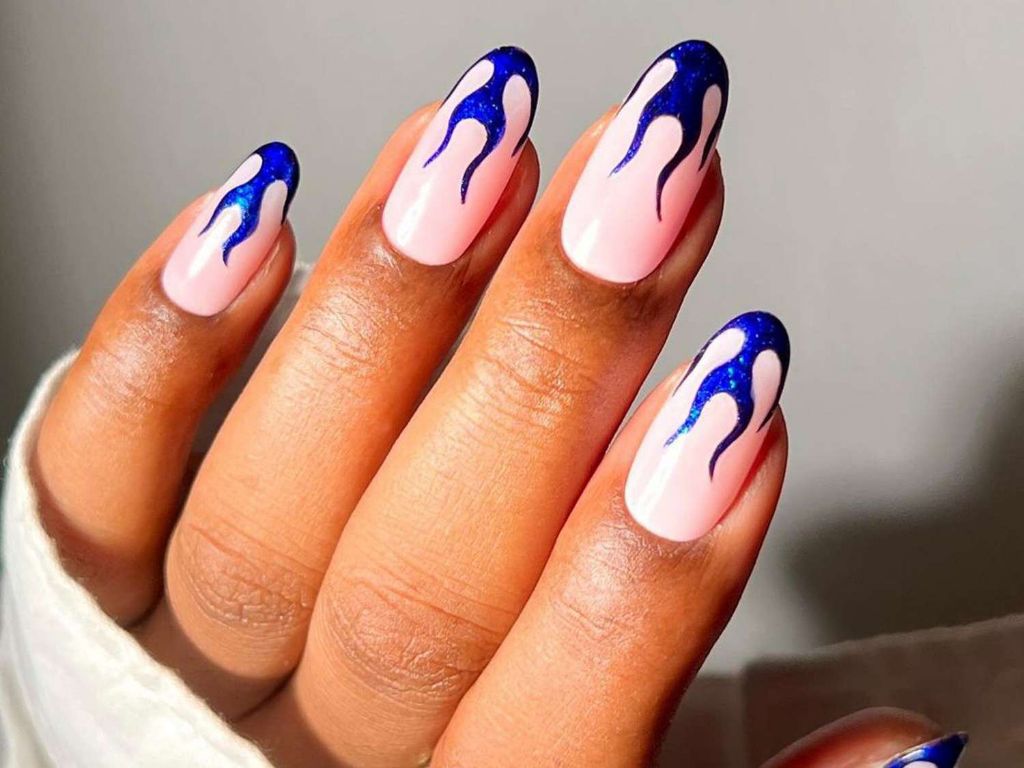
Flames
Flame nail art is a popular design that adds a fiery, edgy look. It’s surprisingly easy to create flame designs at home with some nail art supplies. Here is a step-by-step tutorial for DIY flame nail art:
1. Start with a base coat on clean, dry nails. Paint your nails in a solid color like black, red, or orange that will make the flames pop.
2. Let the base coat dry completely. Then apply a layer of matte top coat over the base color to create a tacky surface for the flames.
3. Decide on the placement of your flames. Using a thin nail art brush, lightly sketch pencil-thin guidelines for the flames. Make them different shapes and sizes.
4. Fill in the flame outlines with red, orange, and yellow nail polish. Try adding multiple colors to each flame for dimension.
5. Use a clean detail brush to blur and blend the edges of the flames so they look more realistic.
6. Finish with a glossy top coat to smooth and seal in your design.Here’s a video tutorial for inspiration.
With some practice, you can create fiery hot nails worthy of a music video or photo shoot!
Leopard Print
A fun way to recreate Rihanna’s edgy nail looks is with a leopard print design. This animal print is bold and fierce, just like Rihanna’s style. Here’s a step-by-step tutorial for achieving leopard print nails at home:
First, apply a base coat on clean, dry nails. Paint your nails in a solid black or other dark color that will contrast well with the spots you’ll add next. Let the base color dry completely before moving to the next step.
Next, dot on the leopard print spots using a nail art tool with a fine point. White or yellow nail polish works best for the spots. Refer to leopard print images for inspiration and aim for different sized spots, some larger and some smaller. Place the spots randomly, using the nail art tool to make both round and elongated dots.
Once finished with the spots, apply a fast-drying top coat to seal in the design. This will help the leopard print last longer without smudging or smearing.
To really recreate Rihanna’s look, finish off with bold black liner around the edges of your nails so the print pops. Then you’ll have fierce nails ready for a night out!
For more inspiration, see: https://talontedlex.co.uk/2019/08/17/how-to-leopard-print-nail-art/
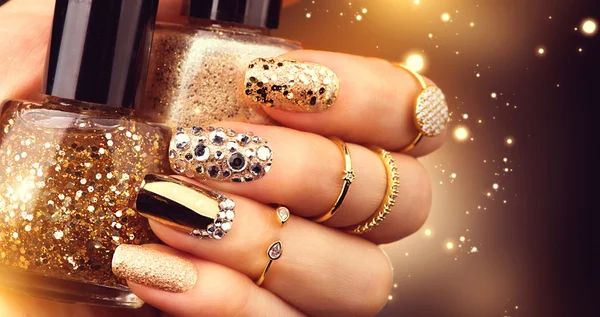
Gems
Gems and jewels can add a fun pop of sparkle and glamour to your nails. Here is a guide for applying gems and jewels to your nails:
Start by cleaning and prepping your nails. Apply a base coat followed by 2 coats of the nail polish color of your choice. Let the polish dry completely. Next, apply a layer of top coat and let it get slightly tacky before adding gems.
Use a pair of tweezers to pick up each gem and place it where desired on the nail. Gently press down to adhere it. For optimal hold, apply a layer of nail glue or gem-tac adhesive before placing the gems. This helps secure them in place.
Focus gems near the nail tip for the biggest impact, or create patterns and designs with different sized gems. Layer gems for a jewel-encrusted look. Try varying the gem colors and shapes for more interest.
Once all gems are placed, seal them by applying another layer of top coat over the gems and polish. Let fully dry. Gems should be securely adhered and ready to show off!1
Ombré
Ombré nails create a gradient effect that transitions smoothly between two or more colors. According to nail experts, the easiest way to achieve this look at home is with a makeup sponge (https://www.wikihow.com/Do-Ombre-Nails).
Start by painting the tip of each nail with the lightest color. Then dab the nail with a sponge loaded with the next darkest shade, blending it up into the first color. Continue dabbing on progressively darker colors, overlapping the gradients as you move up the nail. Make sure to use a patting motion rather than swiping to create a subtle, streak-free ombré.
You can also try using a brush to hand-paint the gradients, though this takes more precision. Work quickly and use thin coats of polish to layer the colors into each other.
Finish with a clear topcoat to smooth and set the ombré design. Allow plenty of drying time between coats. With some practice, you can achieve a pro-level ombré manicure at home.
Nail Art Pens
Nail art pens allow you to draw intricate designs directly onto your nails. They come in different tip sizes and colors, making them versatile for all kinds of nail art. When using nail art pens, shake them well before use and go slowly to maintain control over the lines. Work on one hand at a time so you can rest that hand while designing the other. Use a Q-tip dipped in nail polish remover to tidy up any small mistakes. Refer to tutorials like this WikiHow article when you’re starting out with nail art pens.
Here are some tips for using nail art pens to create beautiful designs:
- Start with clean, dry nails. Nail art pens will not glide smoothly onto nails with base coat or oils on them.
- Draw your design lightly at first, then go over it again with more pressure for bolder lines. This allows you to perfect the design before committing.
- Try dotting and stippling in addition to lining. Nail art pens let you create dots, dashes, and interesting textures.
- Use multiple colors in one design. Nail art pens allow seamless color changes since they are so easy to control.
- Finish with a clear top coat to seal and protect your nail art pen designs.
Holographic Accents
Add an eye-catching shimmer to your nails with holographic foil or powder. Rihanna loves using holographic accents as a fun way to make her nails pop. To get the look, start by painting your nails with a base color of your choice. Once dry, use a small brush or toothpick to apply a topcoat just on the tips or in a design. While still wet, gently press on holographic foil or dust with holographic powder. The holographic pieces will stick to the tacky topcoat. Finish with another layer of topcoat to seal it in. The holographic accents will reflect light, giving your nails a dazzling, multidimensional effect. It’s a simple yet statement-making way to recreate Rihanna’s glam nail art style.
Recap Rihanna’s Hottest Nail Art
Rihanna’s fiery nail art looks aren’t just music video ready, they’re surprisingly DIY-friendly for recreating at home. With the right polishes, tools, and techniques, you can rock some of her most iconic manicures.
Flames, leopard print, bold colors, gems, and holographic accents are all part of Rihanna’s nail art arsenal. Using nail art pens allows you to freehand fierce designs. Ombré gradients and subtle sparkle take her style next level.
The key is being fearless with color, having the right polishes and tools, and taking your time perfecting the look. With practice, you’ll be music video ready in no time. Rihanna’s iconic nails are a perfect way to make a statement and show off your creativity.