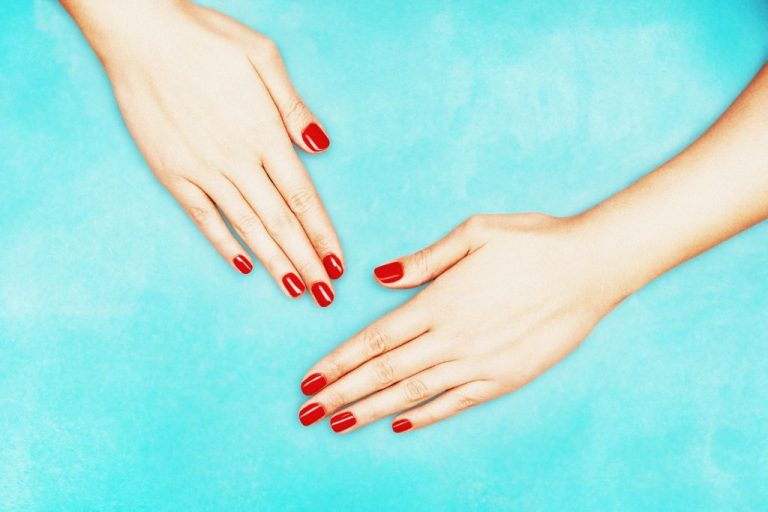
Beyond The Bottle: Creative Techniques For Unique Nail Looks
Welcome to the World of Creative Nail Art
Nail art has exploded in popularity in recent years. According to Lemon8, unique nail art was a top trending topic with over 10,000 engaged users. While traditional nail polish will always be a staple, innovative techniques like blooming gel and 3D designs are taking nails to the next level. This guide will explore the most creative nail art methods beyond just painting on color.
Nail Stamping
Nail stamping is a fun and creative way to decorate your nails with intricate designs and patterns. Here’s an overview of this technique:
What is Nail Stamping?
Nail stamping involves transferring designs from a metal plate onto your nails using a stamper tool. The metal plate has etched designs that act as templates. You apply special nail polish onto the plate to pick up the design. Then you transfer or “stamp” the design onto your nail using the stamper.
Pros:
- Allows you to quickly apply complex, detailed designs like animal prints, florals, and geometric patterns.
- Much faster than hand painting intricate nail art.
- Reusable plates allow you to create hundreds of different looks.
Cons:
- Can take practice to get the technique down.
- Need to purchase stamping plates and special polishes.
- Transfers are not always perfect or aligned.
Supplies Needed:
- Stamping plate – etched metal plate with various designs.
- Stamper – silicone tool used to pick up and transfer designs.
- Scraper – helps remove excess polish from the plate.
- Special stamping polish – thinly pigmented polish that stamps well.
- Base coat – helps designs adhere to the nail.
How to Stamp Your Nails:
- Prep your nails with a base coat to help the design stick.
- Choose a design from the stamping plate. Apply polish over the design.
- Use the scraper to remove excess polish from the plate.
- Firmly press the stamper over the design to transfer it.
- Line up the stamper over your nail and press down to imprint the design.
- Repeat steps on all nails. Add a top coat when done stamping.
With some practice, nail stamping allows you to create salon-worthy designs at home. It opens up endless possibilities for custom nail art!
Nail Decals
Nail decals are pre-made designs that you apply on top of your nail polish to create fun patterns and images. They come in a variety of styles from simple polka dots to intricate floral designs. Nail decals offer an easy way to get creative, artistic nails without needing to hand-paint designs.
You can purchase nail decal kits and sets online or at beauty supply stores. Many sellers on Etsy also offer custom nail decal designs where you can choose your own patterns. For the DIY route, you can create your own nail decals at home using printable decal paper, a computer, and an inkjet printer (Source).
To apply nail decals, start with a clean base coat on your nails. Paint 1-2 coats of your chosen nail polish color and let it dry fully. Cut your nail decals to fit each nail. Apply a drop of top coat on the nail, dip the decal in water to activate the adhesive, then place it onto your nail. Finish it off with another layer of top coat to seal it in. Go slowly and gently to avoid wrinkles or bubbles. With the right technique, nail decals allow you to easily add artistic flair to your manicure!
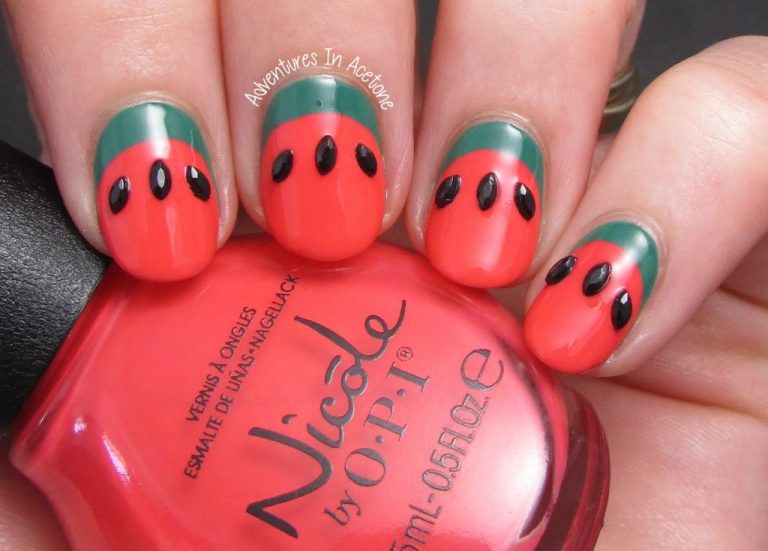
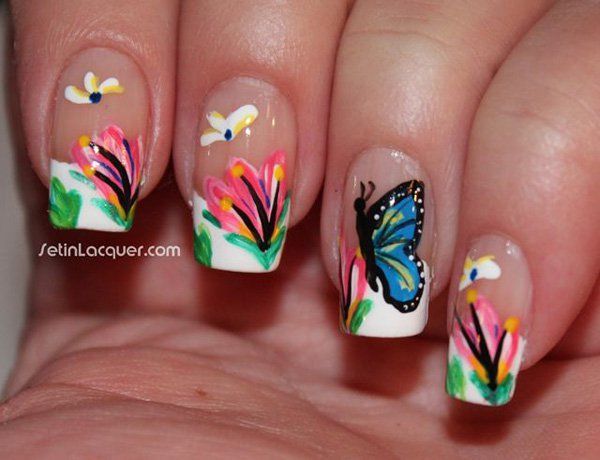
Hand-Painted Art

Hand-painted nail art allows you to freely express your creativity using brushes, dotting tools, striping tape, and high-quality polish. This technique creates unique designs that you can’t get from stamps or stickers.
Freehand painting is done using small, detail brushes to draw designs like flowers, animals, landscapes, or abstract art onto the nails. It takes some practice, but allows full creative control. Popular freehand techniques include ombre gradients, watercolor designs, and lettering.
Dotting tools with various sized heads can make perfect dots, circles, hearts, and other shapes. Drag dotting tools in a line to make dashes and custom shapes.
Striping tape can be used to create straight lines, geometric patterns like chevron, or divides between colors. Apply tape, paint over it, then remove to reveal clean stripes.
High-quality polishes like OPI, Essie, and Zoya provide even coverage and a wide color selection for painted designs. Allow each layer of polish to dry between applications to prevent smearing.
Watch this video for inspiration on the art possible with hand-painting: “Handpainted Nail Art Changed My LIFE”
Glitter Nails
Glitter nails are a fun way to add some sparkle and glam to your manicure. There are a few different types of glitter you can use:
- Chunky glitter – large glitter pieces that add lots of dimension
- Fine glitter – small glitter particles that provide subtle sparkle
- Holographic glitter – iridescent glitter with a rainbow effect
To apply glitter nails, first paint on a base coat followed by your base color. Let the base coat dry completely before moving on. Next, apply a layer of clear top coat and while it’s still wet, sprinkle glitter over the nail where desired. Gently press the glitter into the wet polish. Finish with another layer of top coat to seal in the glitter.
Some tips for easy glitter removal – soak nails in acetone-free remover for 10-15 minutes before scrubbing off. An aluminum foil wrap can help lock in the acetone. Using a wood stick rather than scrubbing with cotton can reduce glitter spreading.
Source: https://www.youtube.com/watch?v=UlWkF64hhBs
Gel Extensions
Gel nail extensions involve applying gel over a nail form or tip to extend and sculpt the natural nail. Gel extensions allow you to lengthen nails, add strength, and create any shape or design. There are some key pros and cons with gel extensions:
Pros:
- Adds length and structure to natural nails
- Wide variety of shapes and designs possible
- Gel is durable and long-lasting
Cons:
- Can damage natural nails if not removed properly
- Require maintenance every 2-3 weeks
- Removal process can be more difficult than other options
The application process involves careful preparation of the natural nail, applying primer, selecting a nail tip or form, brushing on gel layers, and curing under a LED or UV lamp. It’s important to avoid overfiling the natural nail and use thin gel layers for a natural look and proper adhesion (Source).
Gel extensions allow for endless design possibilities. You can create a classic French manicure, experiment with shapes like squoval or coffin, add glitter, rhinestones, or handpainted art. Just be sure to avoid overly bulky or long extensions that put stress on the nail bed. For removal, acetone will break down the gel layers for easy filing and soaking off (Source). With proper technique, gel extensions can allow you to achieve salon nail looks at home.
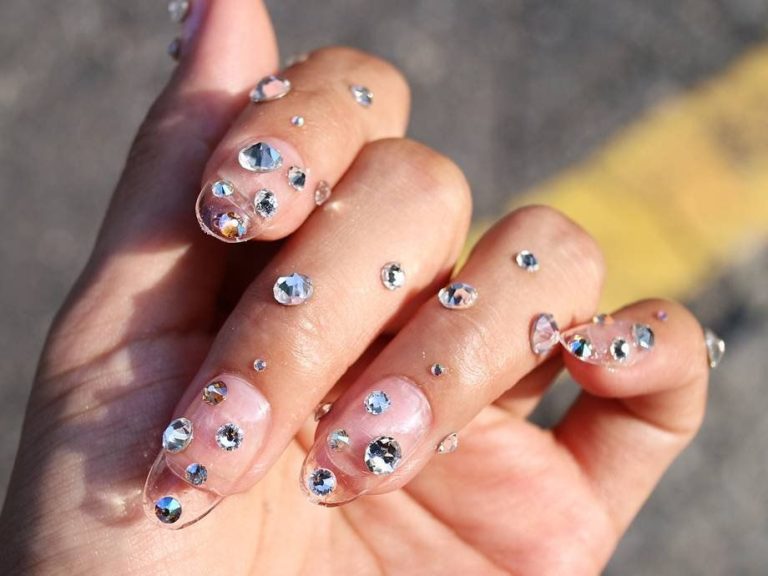
Rhinestones and Embellishments
Rhinestones and other embellishments like charms, studs, and chains can add pops of color, texture, and shine to nail art designs. Here are some tips for working with these nail embellishments:
There are several types of rhinestones to choose from:
- Crystal rhinestones have a classic, transparent glass-like appearance.
- AB rhinestones have an iridescent quality that shifts between rainbow colors.
- Opaque rhinestones come in solid, non-transparent colors like red, blue, black, etc.
- Aurora borealis rhinestones have a rainbow, holographic effect.
When placing rhinestones and other embellishments, consider the overall design. Clustering gems in one area makes a bold statement. Or, spacing them out creates a more subtle, sparking effect. Stones can be placed on just an accent nail or two for a simpler look.
You can also incorporate charms, chains, and studs into nail designs. These should be glued on securely so they don’t fall off. Chains can wrap around a nail for a funky look. Dainty charms work well on a single accent nail. And edgier studs can make a statement on multiple nails.
With so many options for embellishments, you can really customize unique nail art. Just take care not to go overboard with too many elements competing for attention. Focus on a few eye-catching details to ornament your nails.
Nail Wraps
Nail wraps have become a popular nail art technique in recent years. They offer an easy way to get creative designs on your nails without needing artistic talent. Nail wraps are made from thin, flexible material like silk, linen or paper that can be applied to the nails. They come in a variety of patterns, textures and designs.
Applying nail wraps takes some practice but is easier than freehand nail art. First, make sure your nails are clean and dry. Cut the nail wrap to fit your nail size. Remove the plastic top layer and position the nail wrap on your nail, pressing it smoothly from cuticle to tip. Use a file to trim any excess material. Apply a top coat to seal in the design. The wraps should last 1-2 weeks on most people.
One of the best things about nail wraps is how customizable they can be. You can layer different patterns for unique combinations. Small wraps can be used as accents on one or two nails. Rhinestones, glitter or nail art pens can be used on top of the wraps to embellish them. Foil flakes are a fun way to jazz up a wrap design. Don’t be afraid to get creative and make the wraps your own!
(Source: https://glitterbels.com/en-us/blogs/news/a-history-of-nail-art-and-what-could-be-next)
3D Nail Art
3D nail art takes designs to the next level with intricate textures and shapes extending off the nail surface. There are many techniques to achieve a 3D look:
Polymer clay allows for very detailed sculpted creations on nails. Small pieces of colored clay can be shaped into flowers, animals, food, and more before baking them onto the nail. The finished clay charms add striking depth.
Sculpting gel is often used to build 3D designs right on the natural nail. The thick gel is applied and shaped with tools to create swirls, spikes, jagged edges and other dimensional effects. When cured under UV light, the sculpted gel hardens while retaining pliability.
Layering strips of foil or tape can generate a scaled texture on nails. Alternating materials like chrome, holographic, and matte tapes creates visual interest. The layers give nails an armor-like faceted appearance.
No matter the technique, 3D nail art generates unique textures and shapes that grab attention. The avant-garde designs showcase creativity and skill.
Conclusion
To recap, there are so many unique nail art techniques to try beyond basic polish. From nail stamping and decals to hand-painted art, glitter, rhinestones, and more, you can get super creative with your manicures. Nail art is a fun way to express your personality through your fingertips.
Hopefully this overview has inspired you to try out some new nail looks. Don’t be afraid to experiment with different colors, textures, and designs. Follow nail artists online or in magazines for more inspiration. The possibilities are endless when you think beyond the bottle!
For even more nail art ideas and tutorials, check out these additional resources:
[1] https://www.pinterest.com/liveluvtx/nail-art-inspiration/
[2] https://www.pinterest.com/juliettelaura/nail-art-inspiration/