Budget-Friendly Beauty: Affordable Nail Art Supplies & Hacks For Beginners
Nail art has exploded in popularity in recent years. The global nail care market was valued at $9.65 billion USD in 2020 and is projected to reach $15.6 billion USD by 2028 (1). With the rise of social media, nail art has become a fun and creative way for people to express themselves. From simple polka dots to elaborate 3D designs, the possibilities are endless.
However, supplies and professional nail services can get expensive. The average price for a basic manicure is $25 USD, while more elaborate nail art can cost $70 USD or more (2). For beginners looking to try out nail art as a hobby, the costs can add up quickly.
This article will explore budget-friendly options for nail art supplies and techniques. With some creativity and clever hacking of household items, it’s possible to create awesome nail art without breaking the bank. Beginners will find tips for building an affordable starter kit, ideas for DIY tools, and simple techniques to start practicing.
Sources:
(1) https://www.grandviewresearch.com/industry-analysis/nail-care-market
(2) https://www.namepepper.com/nail-salon-statistics-and-trends
Basic Supplies for Nail Art
When getting started with nail art, there are a few basic supplies you’ll want to have on hand. These include:
Nail polish – Pick up a selection of core colors like black, white, nude, red, pink, and blue. You’ll use these for base coats, filling in designs, and adding detail. Go for affordable drugstore brands like Sally Hansen and Wet n Wild which offer lots of shades under $5. According to this article, you’ll want at least 10-12 polishes to start.
Nail art brushes – Invest in a pack of assorted small brushes for details like stripes, dots, and lines. Look for a set like this one that includes different brush tips and sizes for versatility.
Dotting tools – These metal or wooden sticks with different sized balls on the tips allow you to easily make polka dots and other circular designs. Get a kit with multiple sizes like this dotting tool set.
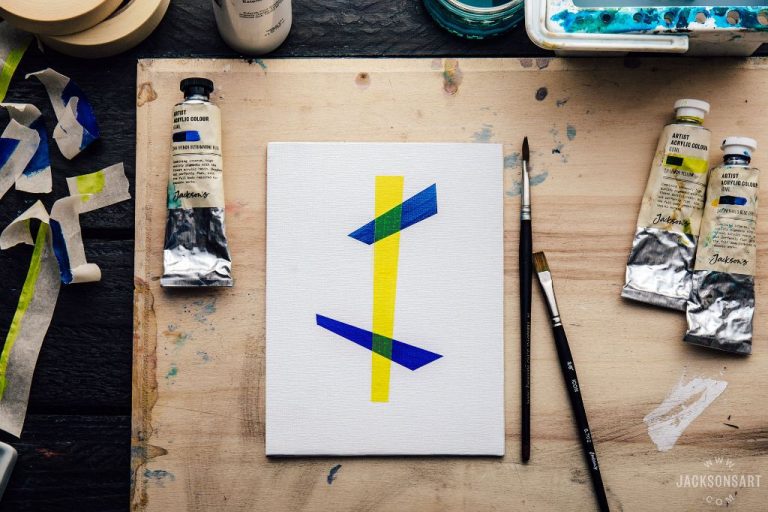
Striping tape – Tape makes it easy to create straight lines and geometric shapes. Buy a multi-pack with striping tape in different widths and colors.
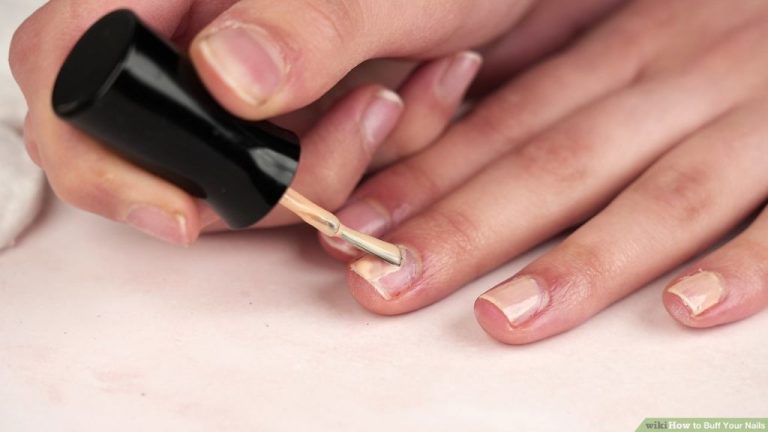
Top coat – A glossy top coat is essential for locking in your designs. Get a quick-dry one so you can finish off your nail art quickly.
DIY Tools from Household Items
You don’t need fancy or expensive tools to create cute nail art designs. Many common household items can be repurposed into makeshift nail art tools. This allows you to save money while unleashing your creativity.
Toothpicks make excellent dotting tools for painting small dots and details. Cut the pointed end off a toothpick and use the blunt end to dot on polish. The tip can be trimmed smaller for teeny dots or left larger for bigger dots. Toothpicks are inexpensive and disposable, so you can easily use a new one for each color without cleaning in between.1
Bobby pins can create perfect stripes and lines. Use the wavy side for thicker stripes or the straight side for thin lines. The metal holds polish well and provides more control and precision than a regular paint brush. Bobby pins can also be used for ombre gradients by slowly pulling the pin through wet polish.
Pencil erasers work wonderfully for creating hearts, flowers, and other shapes. Cut or slice erasers into different shapes and sizes. Then use the eraser stamp to print designs onto the nail. Pencil erasers are cheap and easy to cut into custom shapes and sizes using scissors or a craft knife.
Paper hole reinforcers are perfect for making polka dots. The various sizes allow for different dot sizes. You can paint them with polish, then press onto the nail for perfectly uniform dots every time. The paper reinforcement provides a guide and absorbs any excess polish, creating crisp edges.
Buying Supplies on a Budget
Shopping sales and clearance sections can help find great deals on nail art supplies. Many craft stores will mark down items like nail polish, tools, embellishments, and more at various times throughout the year. Keep an eye out for coupons and promotions as well. Signing up for store loyalty programs can provide discounts and early access to sales.
Buying nail supplies in bulk online tends to offer the best value. Large packs of nail polishes, striping tape, rhinestones, and decorations can be purchased at wholesale prices. Sites like Amazon, eBay, and AliExpress provide variety and low costs when purchasing bulk nail art essentials.
Splitting costs with friends is a clever way to build up a nail supply stash without breaking the bank. Go in on a haul together and then share items. This allows each person to get a wider assortment of colors, tools, and decorations while saving money.
Cheap Nail Polish Options
When starting out with nail art, you don’t need to spend a lot of money on polish. There are many great affordable options from drugstore and salon brands.
Some top drugstore nail polish brands include OPI, Essie, Sally Hansen, and L.A. Colors. These can often be found for $5 or less per bottle. OPI and Essie especially are salon-quality polishes at drugstore prices. Sally Hansen and L.A. Colors offer even cheaper options under $2 per bottle. Look for sales and clearances for the best deals.
Salon brands like OPI, Essie, and Orly often go on sale at beauty supply stores like Ulta and Sally Beauty. You can find polishes discounted to $2-5 per bottle. Check for sales, coupons, and clearance sections in stores or online to find these deals.
You can also make your own colored polish easily with a clear base, like Sally Hansen’s Big Shiny Top Coat, and eyeshadow or acrylic paint. Just mix a small amount of pigment into the clear polish. This allows you to create any color for mere pennies!
Simple Nail Art Techniques
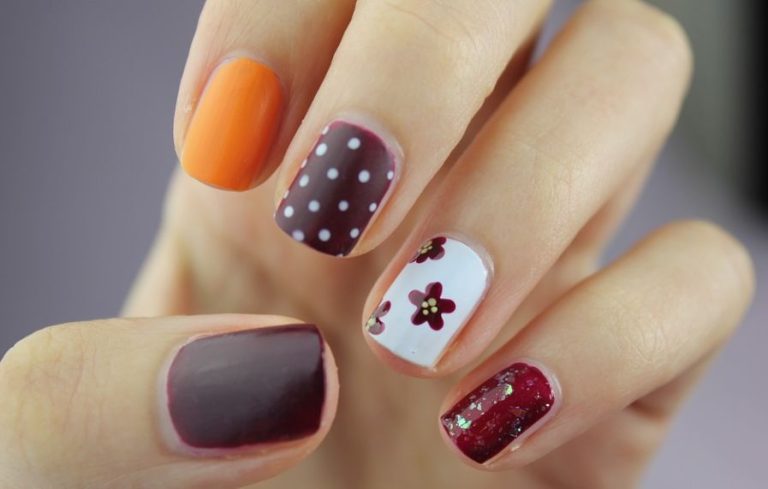
Nail art doesn’t have to be complicated. There are simple techniques perfect for beginners that can create stylish designs with minimal supplies and effort. Here are some easy nail art techniques to try:
Dotting – Create patterns of dots using a dotting tool. Dip the metal end in nail polish and gently tap it onto the nail. Try polka dots, stripes, hearts, or abstract dot designs. For more on dotting tools see this tutorial: https://www.missjessicasnails.com/blog/2016/9/dotting-tools-nail-art-techniques.html
Striping – Use striping tape to create clean, straight lines or geometric patterns. Apply strips of tape in your desired design, then paint over them with nail polish. Remove the tape to reveal perfect stripes and shapes underneath. See how in this beginner striping tape tutorial: https://styleeasily.com/easy-nail-designs-with-striping-tape/
Ombre – Ombre creates a gradient effect by blending two or more nail polish colors together. After applying your base color, use makeup sponges to lightly dab on other shades from cuticle to tip. Check out this simple sponge gradients guide: https://cutepolish.com/ombre-nail-tutorial/
Stamping – Use nail art stamping plates and polishes to transfer intricate designs onto nails. Apply special polish to the plate, scrape off excess, then press your nail onto the design. Lift to transfer it onto your nail. See stamping basics here: https://www.cosmopolitan.com/style-beauty/beauty/how-to/a55542/nail-stamping-for-beginners/
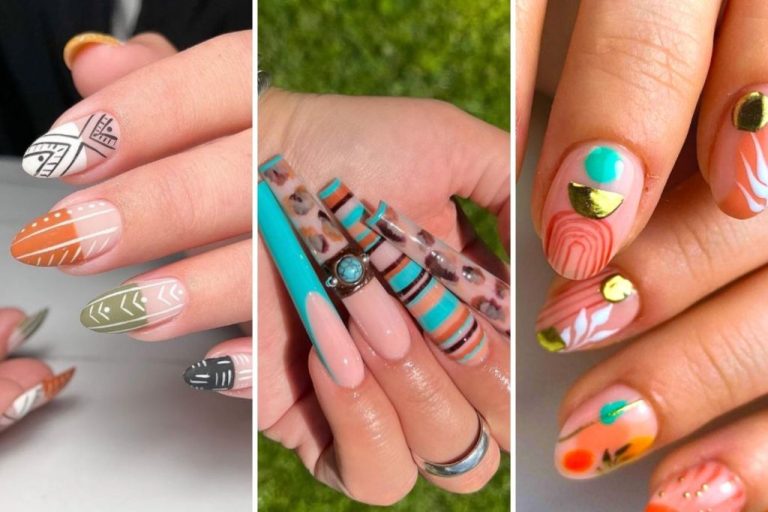
Nail Art Inspiration
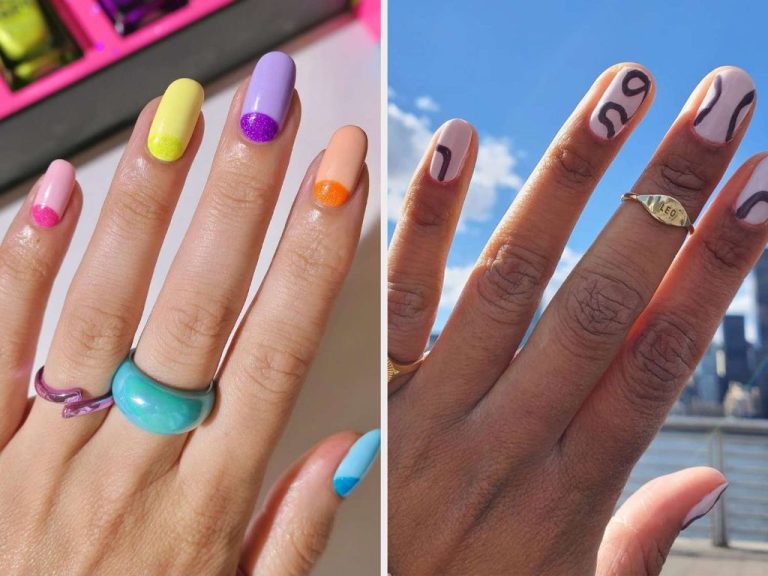
Start looking for nail art inspiration on popular social media sites like Pinterest and Instagram. Pinterest has an endless feed of nail art tutorials and designs. Search for hashtags like #nailart, #nailartdesigns, or #nailarttutorial to find ideas. Instagram is also full of nail art inspiration from both professional nail artists and amateurs. Search hashtags like #nailartideas, #nailartoftheday, or #nailartinspo to spark your creativity.
YouTube is another excellent platform to find free beginner nail art tutorials. There are so many step-by-step videos showing you exactly how to recreate cool designs. Search for terms like “easy nail art for beginners” or “simple nail art tutorial.” Take screenshots of your favorite designs to try later. Remember to start with basic techniques and build up your skills over time. Don’t get discouraged if your early attempts don’t turn out perfectly!
Finding inspiration from others will give you creative ideas and motivate you to keep practicing. Soon you’ll be able to design your own unique nail art!
Nail Art Storage
Properly storing your growing collection of nail polishes, tools, and supplies will keep everything organized and easy to find. You don’t need fancy organizers – there are plenty of budget DIY storage solutions using items you already have at home.
Repurposed containers like jars, boxes, or trays work great for holding small supplies like glitter, rhinestones, striping tape, etc. Try using an old candle jar, Altoids tins, or a compartmentalized tray from the dollar store. They help keep all your tiny embellishments in one place.
For nail polish, small makeup bags are ideal for stashing colors together or separating by shade. Look for cheap or free options like small cosmetic bags, pouches, or zippered cases. Stand bottles upright so you can easily see the colors. Use one bag or pouch per category like reds, blues, neutrals, etc.
Built-in organizers like wall shelves, hanging racks, or acrylic drawers are affordable DIY options. Mount a wire shelf on the wall to neatly display polishes. Try repurposing an old wooden spice rack. Use removable adhesive hooks to hang bags or polishes. Dollar store acrylic drawers are perfect for stacking on a desk or shelf. Get creative with household items!
Check out these ideas for inspiration on Pinterest.
Maintenance Tips
Proper maintenance is key to keeping your nail art looking fresh and preventing damage to the natural nail. Using a base coat and top coat is essential to protect the nail bed and lock in color (https://www.londontownusa.com/blogs/londontown-blog/beginners-to-nails). Apply a base coat first before starting your design to help prevent staining. Finish with a glossy top coat to seal and smooth everything out.
Regularly file and shape your nails to keep them at a length you’re comfortable with and prevent snags and breaks. Use a glass file and gentle strokes in one direction. File nails after a shower or bath when they are softer.
When removing nail art, avoid pulling or peeling which can damage the nail bed. Use pure acetone or an acetone-free remover and cotton balls. Gently roll or press the cotton on each nail, allowing the remover to dissolve the polish. Once it wipes away cleanly, apply cuticle oil to condition the nails (https://www.hi.edu/post/a-beginner-s-guide-to-nail-care).
Conclusion
Now that we’ve explored a variety of budget-friendly options for getting started with nail art as a beginner, let’s recap the main points.
First, basic supplies like nail polish, dotting tools, striping tape, and brushes can often be purchased inexpensively from drugstores, discount retailers, and even the dollar store. With a little creativity, many household items like bobby pins, toothpicks, and paper reinforcers can double as DIY nail art tools. Buying nail polish on clearance sales or in value sets can help maximize your investment. Simple techniques like ombre, dots, stripes, and decals are beginner-friendly ways to start practicing nail art without advanced skills.
The benefit of relying on affordable options is that you can build an entire starter kit for very little money. This makes nail art accessible for those on a tight budget. You also don’t have to worry about wasting expensive supplies as a beginner still developing skills. Simple, minimalist designs are another way to enjoy nail art without breaking the bank.
Most importantly, remember to embrace creativity, experimentation, and having fun as you begin your nail art journey. Don’t be intimidated by theCost should not be a barrier to nurturing your creativity and self-expression.