From Beginner To Pro: Your Nail Art Journey Starts Here!
Welcome to this comprehensive guide on how to progress from nail art beginner to pro! In this article, we’ll walk you through the key steps to take on your nail art journey – from learning the basics and essential tools, to mastering simple designs, intermediate techniques, and advanced nail art. You’ll discover inspiring ideas and troubleshooting tips to help you create stunning nail art with confidence. Whether you’re new to nail art or looking to improve your skills, this is your complete roadmap to nail art mastery – from your very first manicure to professional-level designs.
Let’s get started on the exciting path to becoming a nail art pro!
Nail Art Basics
There are many types of nail art to explore as you start your journey. Common techniques include nail stamping using pre-made images, freehand painting designs, using nail stickers and decals, attaching rhinestones and other embellishments, and more. According to nail expert Mason Anthony, the five basic nail art techniques to start with are polka dots, basic lines, ombre, glitter tips, and using nail tape (source).
It’s also important to know the different nail shapes that can be used for nail art. The most common nail shapes are square, squoval, round, coffin, and almond. The shape you choose will impact the design and what techniques work best. For example, nail stamping can be easier on a square nail versus a round shape.
No nail look is complete without a proper base, color, and top coat. Applying base coat helps the polish adhere to the nail. The color coat brings your design to life. Top coat is essential for adding shine and helping protect the color underneath. Using quality nail products will elevate your overall nail art.
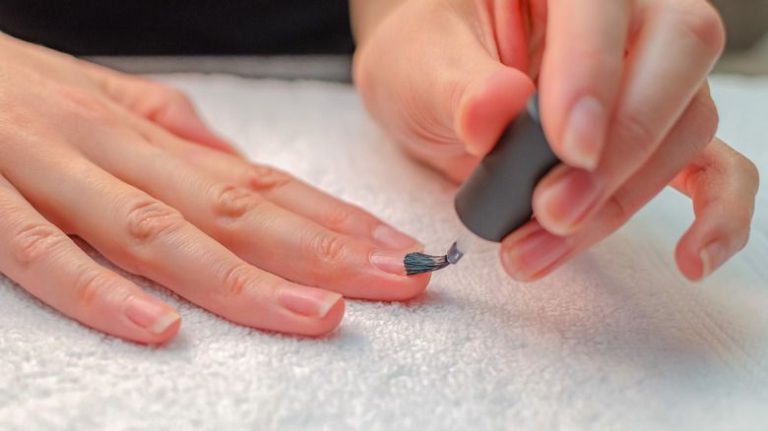
Nail Art Tools
Having the right tools is essential for creating beautiful nail art designs. As a beginner, start with the basics like dotting tools, striping tape, and brushes. A must-have starter kit includes:
- Dotting tools – Different sized metal balls on wooden sticks used to create dots and other shapes.
- Striping tape – Thin tapes used to create straight lines and geometric patterns.
- Detail brushes – Fine tip brushes for freehand painting.
- Top coat – Protects designs and provides a glossy finish.
- Base coat – Helps polish adhere to nails.
- Nail polish remover – For cleaning up mistakes.
- Cuticle pusher – For neatly shaping cuticles before starting.
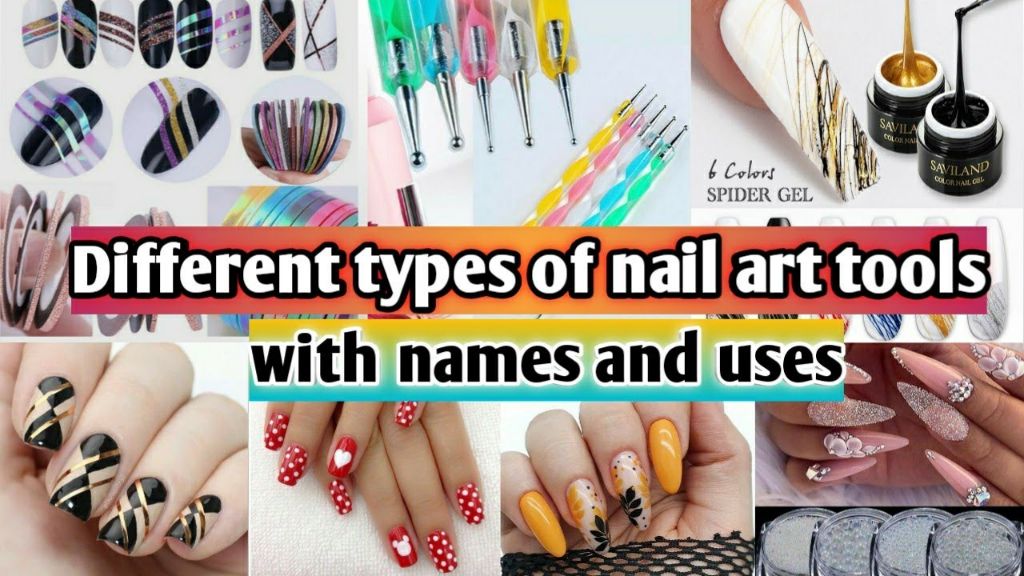
A comprehensive starter kit like the Tomicca Gel Nail Polish Starter Kit provides all the essential tools and polish to get creating! As you advance, invest in quality professional-grade tools.
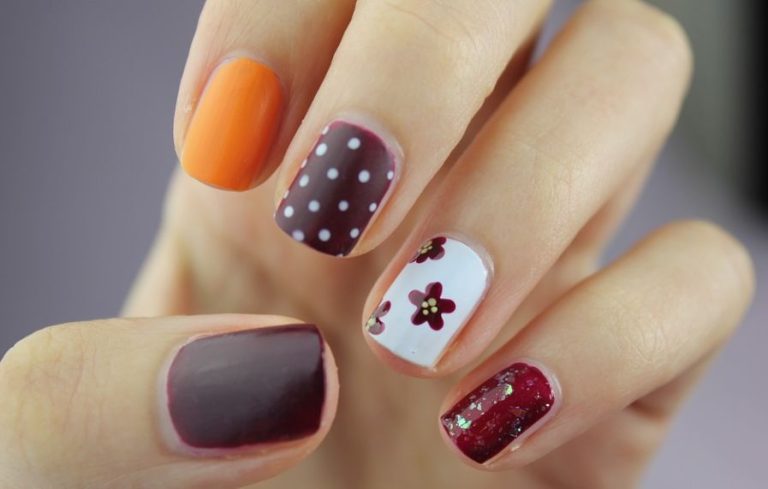
Simple Nail Art Designs
When starting out with nail art, it’s best to begin with simple, classic designs that are easy to execute. Once you have mastered some fundamental techniques, you can move on to more advanced nail art.
Here are some simple nail art looks that are perfect for beginners:
Solid Color Manicure
A solid color manicure is the most basic nail art look. All you need is a nail polish color of your choice. Paint each nail with 1-2 coats of your chosen shade for a clean, classic manicure. Make sure to use a top coat to seal and protect the polish.
French Manicure
The classic french manicure is another easy nail art option. Paint the tips of your nails white, leaving the rest of the nail bare or with a subtle nude polish. You can use white nail polish, or opt for white acrylic paint with a thin brush for more precision. Finish with a top coat for shine.
Basic Stripes, Dots and Shapes
Add a touch of pizazz to solid color manicures with simple stripes, dots or geometric shapes. For vertical or horizontal stripes, use striping tape. For polka dots, dip a toothpick in polish and gently dot onto the nail. Use a striping brush or toothpick to paint basic shapes like triangles, squares or zig zags.
With just a few supplies and some practice on these elementary nail art techniques, you’ll be ready to take on more advanced designs in no time!
Intermediate Nail Art
Once you have mastered the basics, you can start exploring more intricate intermediate nail art techniques to take your manicures to the next level. Some popular intermediate techniques include:
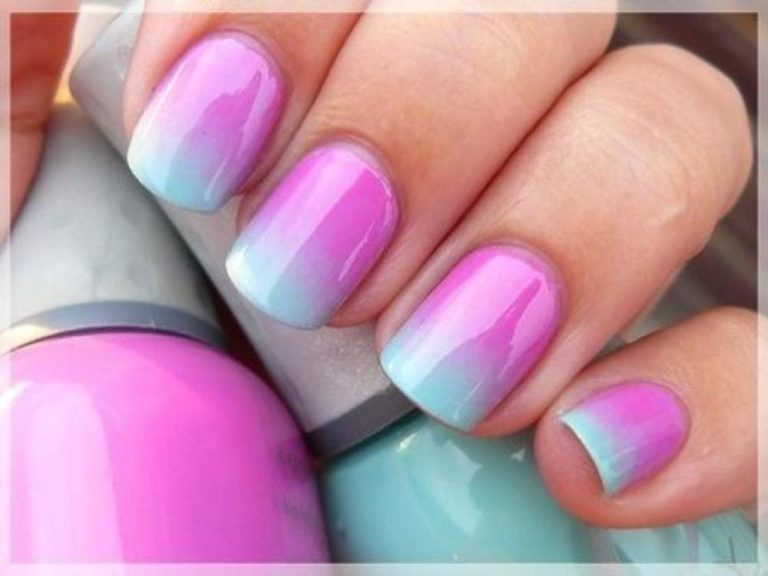
Ombre and gradients – These blended effects create a smooth transition between two or more colors. Ombre fades from dark to light while gradients can fade between any colors. They add dimension and a fun splash of color.
Stamping – This involves using a metal plate etched with designs and a scraper to pick up polish, then stamping it onto the nail. Stamping allows you to quickly apply detailed geometric patterns, floral motifs, and more. Check out this stamping tutorial for beginners: https://www.pinterest.com/pin/22257640657461033/
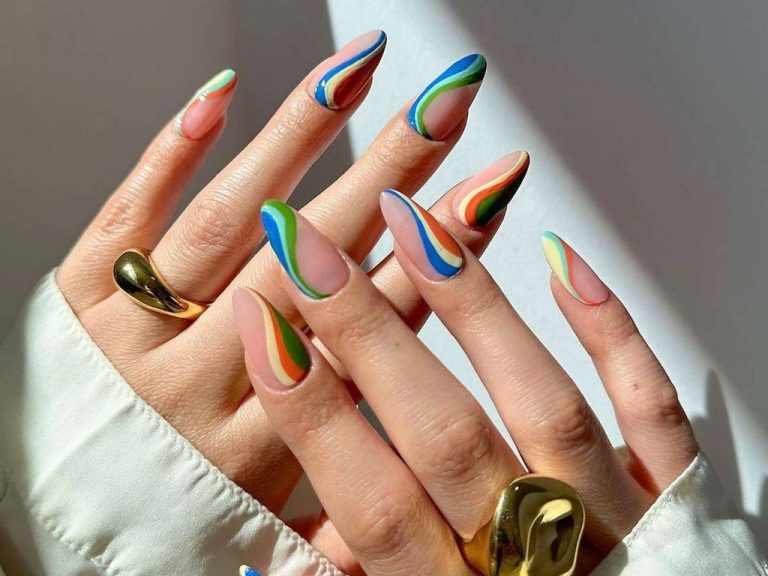
Simple floral and geometric nail art – Once you’re comfortable with nail art brushes, you can start painting miniature flowers, leaves, dots, lines, and other shapes to create pretty designs. Floral and geometric nail art looks sophisticated but is approachable for an intermediate nail artist.
With some practice, you’ll be able to impress friends and have fun with these artistic manicures. Remember to take your time, and don’t get discouraged if they don’t come out perfect right away. Nail art is a skill like any other, and you’ll notice yourself steadily improving the more you try these intermediate techniques.
Advanced Techniques
Once you have mastered the basics, you can move on to more advanced nail art that allows you to really express your creativity and skills. Some popular advanced techniques include:
Freehand Painting: With practice, you can learn to paint intricate designs, portraits, landscapes, and more using a steady hand and a fine nail art brush. Freehand painting lets you create truly custom, one-of-a-kind nail art.
3D Designs: Take your nail art to the next level by affixing charms, studs, rhinestones, and other embellishments to create a 3D effect. You’ll need products like nail glue and top coat to attach them securely. 3D designs add fun texture and dimension to your manicure. (1)
Mixing Mediums and Textures: Combining matte and shiny finishes, glitters and creams, foils and gels – the possibilities are endless when you blend different polishes, acrylics, powders, and gels. Experiment with layering and textures for multi-faceted nail art.
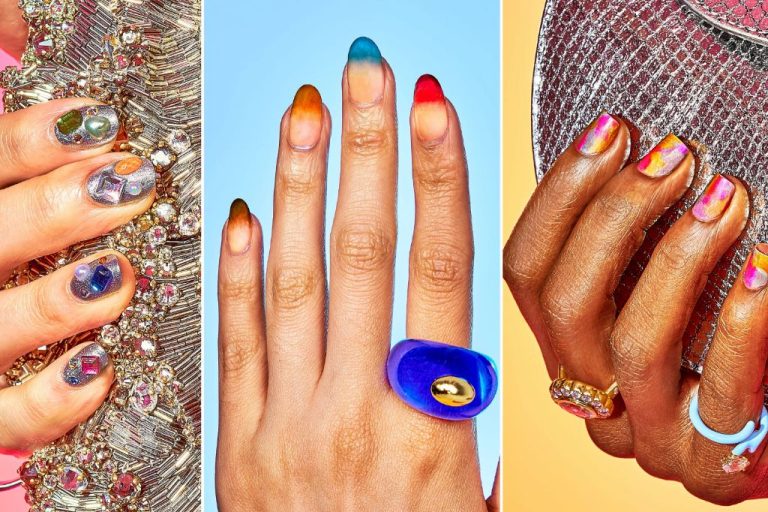
Nail Art Inspiration
Looking for fresh ideas and motivation for your next nail art creation? Check out seasonal designs, holiday nails, and popular looks from Instagram and Pinterest for inspiration.
Seasonal nail art incorporates colors, patterns, and themes related to a specific season or time of year. For spring, think soft pastels, florals, and nature themes. Summer nail designs may feature bright neons, fruit motifs, and ocean or tropical elements. Rich fall hues like deep reds, oranges, and purples are perfect for autumn, alongside harvest and Halloween-themed nails. Winter nail art ideas include sparkling icy blues and silvers, snowflakes, and touches of holiday red and green.
Dress up your nails for holidays and celebrations with unique designs. Valentine’s Day may feature romantic reds and pinks, hearts, and Cupid arrows. Go green for St. Patrick’s Day with clovers, leprechaun hats, and shamrocks. Independence Day calls for patriotic reds, whites, and blues with stars and firework accents. Get creative for Halloween with jack-o-lanterns, ghosts, cobwebs, and other spooky details. The fall and winter holidays like Thanksgiving, Hanukkah, and Christmas offer opportunities for turkey nails, menorahs, trees, presents, and more.
Social media is a hub for the latest nail trends. Browse nail art hashtags and accounts on platforms like Instagram and Pinterest to discover amazing designs. Recreate your favorites or use them as inspiration to put your own spin on stylish nail looks. Some current popular themes include floral prints, geometric shapes, minimalist nude nails, chrome or holographic finishes, creative negative space, marble, ombre gradients, and 3D embellishments.
Looking to Nail Art Inspiration | Nail Design Ideas | Nail Art Trends. Turn to social platforms and seasonal nail designs to spark creativity for stunning nails all year round.
Caring for Nail Art
Properly caring for your nail art designs is key to making them last longer and keeping your nails healthy. Here are some tips:
To protect your manicure, apply a good topcoat like Seche Vite (source) over the nail art. This seals in the design and adds a glossy finish. You can also wear gloves when doing housework or other activities that are rough on nails.
When it’s time to remove nail art, never peel it off, as this can damage the nails. Instead, use an acetone-based remover and soak cotton balls, then hold them against the nail for 30 seconds before gently sliding the polish off (source). This slowly dissolves the polish for easy, safe removal.
Always moisturize and massage cuticles after removing nail polish. Let your nails breathe overnight or use nail treatments with vitamins to promote strength and growth. Avoid overusing nail polish remover, and give your nails an occasional break from constant manicures.
Troubleshooting Issues
No matter how skilled you are as a nail artist, mistakes and mishaps can happen. Thankfully, many common nail art problems can be easily fixed. Two of the most frustrating issues that every nail artist encounters are smudges and flooding.
Smudged nail designs are one of the most common problems. This happens when the nail polish or art isn’t completely dried, and your finger accidentally touches something and smears the design. To fix minor smudges, use a small, thin brush dipped in nail polish remover to gently wipe away the smear. For larger smudged areas, you may need to remove the section with a cotton swab and start over. Be patient and allow each layer of polish to dry fully before moving on.
Flooding occurs when too much nail polish gets on the skin around the nail, creating a messy look. Use a small brush to apply polish remover around the edges to clean up any flooded polish. Work carefully to avoid removing polish from the actual nail. Prevent flooding by using less polish and blotting brushes before stroking onto the nail.
Other common mishaps like brush strokes, bubbles, and polish bleeding onto the skin can also be fixed by using a tiny brush with remover to gently wipe away the mistake. Don’t get discouraged! With practice, you’ll get better at avoiding issues. And remember – even the pros have to troubleshoot problems sometimes.
For tips on troubleshooting other common nail art problems, check out this helpful guide.
Next Steps as a Nail Art Enthusiast
Once you’ve honed your skills in nail art, there are several ways to continue growing as an enthusiast.
One idea is to keep developing your own personal style. Experiment with new techniques, colors, and designs to find a unique artistic vision. Look at nail art books and magazines for inspiration, but don’t be afraid to put your own creative spin on things.
You may also want to consider getting certified as a professional nail technician. This involves completing an accredited training program and passing exams to earn a license in your state. Some popular nail tech programs can be completed online, like the Nail Artistry Certification course from New Skills Academy.
Additionally, connect with nail art communities through social media, local workshops, conventions, and more. This allows you to get feedback, discover new trends, and collaborate with fellow nail art lovers. Consider starting a nail art blog or account to showcase your work.
As your passion grows, remember to take inspiration from the world around you. Approach each design as a chance to express your creativity. With dedication, you can go from nail art beginner to true artist.