Budget-Friendly Diy Nail Art Supplies You Can Find At Home
Introduction
DIY nail art has become increasingly popular in recent years as a creative and budget-friendly alternative to getting your nails done at a salon. Doing your own nail art at home allows you to switch up your look as often as you want without spending a lot of money. Plus, it’s a fun way to express your own unique style and creativity. With just a few inexpensive household items, you can create sophisticated nail designs that rival what you’d get from a professional.
The recent rise in popularity of nail art is likely due to the COVID-19 pandemic. With salons being closed or operating at limited capacity, many people turned to DIY nail art as a way to give themselves a little pampering and self-care at home. Social media has also played a big role, with nail art tutorials and trends spreading widely across platforms like Instagram, TikTok and YouTube. Though salons are open again, the DIY nail art craze is still going strong.
Nail Polish
Most women have a collection of nail polish that goes largely unused. According to a 2017 survey, the average woman owns about 57 nail polishes. Instead of buying new colors, take the time to go through what you already have. You likely have a rainbow of shades that can be used to create fun nail art.
When picking polishes, try using different finishes like matte, glitter, crackle, and more. Matte polishes are great for minimalist nail art while glitter and crackle polishes add exciting textures. Playing with different finishes is an easy way to take your basic nail colors to the next level.
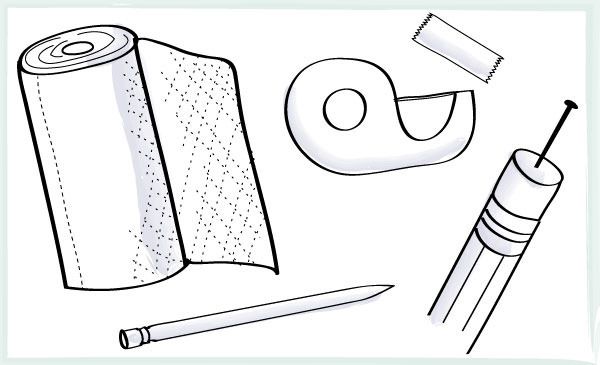
Toothpicks
Toothpicks are a versatile tool for creating dots, lines, and shapes in nail art designs. Carefully dip the end of a toothpick into your chosen nail polish color. Then, gently touch the toothpick to your nail where you want to place a dot. You can make dots of varying sizes by using more or less nail polish on the toothpick. For lines, gently drag the toothpick across your nail in the desired direction. You can make straight lines or experiment with wavy, zig-zag, or curved lines.
Toothpicks are also great for shapes. Carefully outline the shape you want with the polish-dipped toothpick. Fill it in with more dots or lines if desired. You can make shapes like hearts, stars, and even letters or numbers.
One word of caution with toothpicks – be very gentle to avoid splinters in your nails or fingers. Use a fine grit nail file to smooth any toothpicks before using them. Discard and replace toothpicks frequently as the ends get frayed. And shape or trim them as needed to create different sizes.
Bobby Pins
Bobby pins can be used to create interesting nail art designs like ombre, stripes, and geometric shapes. The key is using the round side of the bobby pin to stamp polish onto the nail. You can load polish onto the rounded end and stamp it onto the nail to create fun patterns like polka dots or diagonal stripes (Source). When using the straight edge of a bobby pin, be careful of the sharp point which could hurt the cuticles or skin around the nails.
Some ideas for using bobby pins include:
- Ombre – Use the round end to stamp on gradient shades from light to dark.
- Stripes – Use the straight edge to create striped textures.
- Geometric shapes – Stamp different geometric shapes onto accent nails.
The key is loading a small amount of polish onto the bobby pin and then gently pressing onto the nail in the desired pattern. Go slowly and carefully to avoid smudging. Bobby pins offer an easy DIY way to get creative with fun nail art!
Tape
One of the easiest DIY nail art supplies you likely already have at home is tape! Tape can create clean lines and geometric or abstract shapes. Painter’s tape, masking tape, or scotch tape all work well for nail art designs. Simply apply strips of tape in your desired pattern on the nail before painting over it with polish. Peel off the tape immediately after painting to reveal perfect lines and shapes (Source). Taping off areas before painting is an easy technique for beginners to get sharp edges. Experiment with different patterns like chevron, zigzag, or crisscross designs using tape.
Aluminum Foil
Aluminum foil can add unique effects to nail art designs. The metallic sheen makes it perfect for creating ombre or chrome nail looks. It can also be used to get a glittery effect when crumpled into a ball and dabbed onto wet polish.
Foil comes in various colors like silver, gold, rose gold, copper, and more. So you’re not just limited to the standard tin foil from the kitchen. Check your local craft or baking supply store for a wider selection of foil colors and finishes.
When working with foil, be very careful of any sharp edges as you cut pieces to size. Use a file to smooth any rough areas before applying to nails. The softer and smoother the foil edge, the better it will adhere to the nail.
See some stunning foil nail art examples for inspiration: https://www.pinterest.ca/delissnails/foil-nail-art/
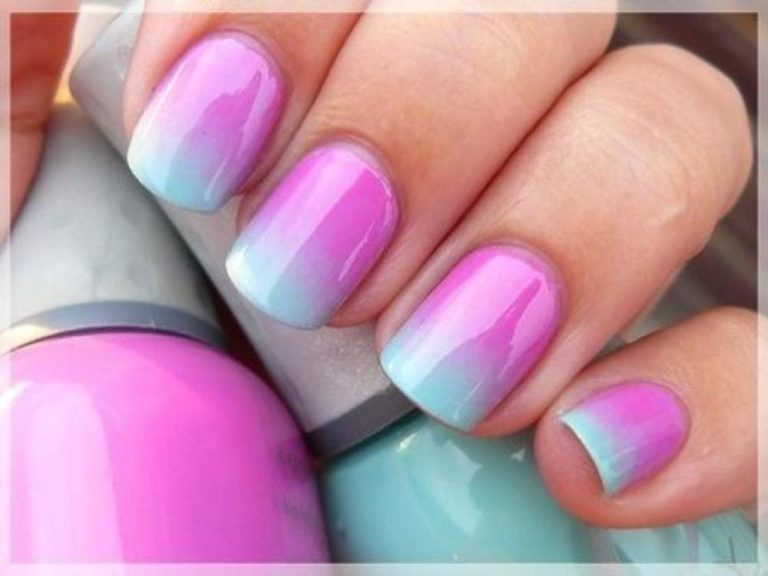
Sponges
Makeup sponges like beauty blenders are a great DIY tool for creating gradient nail art designs. Using a makeup sponge, you can dab two or more nail polish colors onto the nail to seamlessly blend them together. This creates a beautiful ombré effect. Simply dab the sponge into your chosen nail polish colors and then onto the nail in a patting motion to achieve the gradient.
However, it’s important to note that normal makeup sponges will absorb a lot of nail polish, which can be wasteful. For best results, use cosmetic sponges that are specifically designed for nail art. These have a smooth, non-porous surface that allows you to create gradient designs without soaking up all the polish. Look for wedge-shaped sponges made from a smooth, plastic-like material. Using the correct nail art sponges will create better gradients and save your polishes.
Toothpicks and Cotton Swabs
Toothpicks and cotton swabs are excellent tools for creating easy dot and stripe nail art designs. The cotton ends of swabs can be used to make uniform dots of various sizes. Simply dip the cotton tip in nail polish and gently dab it onto the nail to make dots. Varying the amount of polish on the swab and the amount of pressure applied when dabbing will create different sized dots.
Toothpicks are perfect for making striped designs. Dip the tip of a toothpick in polish and use it to draw stripes or lines onto the nails. You can make straight, curved, or angled stripes. For wider stripes, hold the toothpick flat against the nail. For thinner stripes, use just the tip. Experiment with different color combinations and stripe placement to create unique designs.
Combining dots and stripes using swabs and toothpicks opens up many possibilities for easy DIY nail art. For example, you can make polka dot stripes by alternating dots and stripes. Or place dots in between striped lines. You can also outline dots with a contrasting stripe color. The simplicity of these tools makes it easy for even nail art beginners to create cute designs.
For more inspiration and tutorials, check out this guide: https://www.wikihow.com/Do-Easy-Nail-Art-with-a-Toothpick-for-Beginners
Household Stamping Items
Around your home, you likely have various items that can be used to “stamp” cool patterns and designs onto your nails. Rubber stamps, vegetables, and even Legos work great for this.
To stamp a design, first paint your nails with your base color and let them dry fully. Then apply a top coat and let it get tacky before stamping – this helps the pattern transfer better. Gently press the stamping item onto the nail in your desired pattern.
For vegetables and fruits, cut them to expose the patterned inside flesh. Gently press onto the nail. For items like Legos, press them into the nail bed upside down to pick up the pattern.
Once done stamping, apply another layer of top coat to seal in the design. This helps protect it from getting damaged. Be creative with household items to make custom nail art stamps!
Conclusion
With just a few common household items, you can unleash your creativity and create beautiful nail art designs right at home. From using toothpicks for detailed dotwork to aluminum foil for cool metallic effects, this article has highlighted unique DIY nail art supplies you likely already have around the house.
Doing nail art yourself allows you to customize designs exactly how you envision them, without the high costs of visiting a salon. With some nail polish and items like bobby pins, tape, and even just toothpicks, you can make professional-looking nail art and save money in the process.
The next time you want to spice up your nails, look no further than your own home. Get creative with these budget-friendly DIY nail art tools and let your inner artist shine through your fabulous nails.