The Art Of Diy Nail Filing: Tips For Perfect Shapes
Achieving the perfect nail shape is essential for a professional, polished look. Your nail shape has a big impact on the overall appearance of your hands. Taking the time to properly shape your nails with precision filing techniques will allow you to sculpt an elegant silhouette that complements your fingers.
In this guide, we will cover the key steps and tips for DIY nail filing at home. You will learn about the tools you need, the various popular nail shapes, filing techniques to create a smooth curve or straight edge, how to determine the ideal length, and finishing touches for beautiful, balanced nails. With practice and the right approach, you can master the art of nail shaping and enjoy stunning nails that make a statement.
Prepare Nails
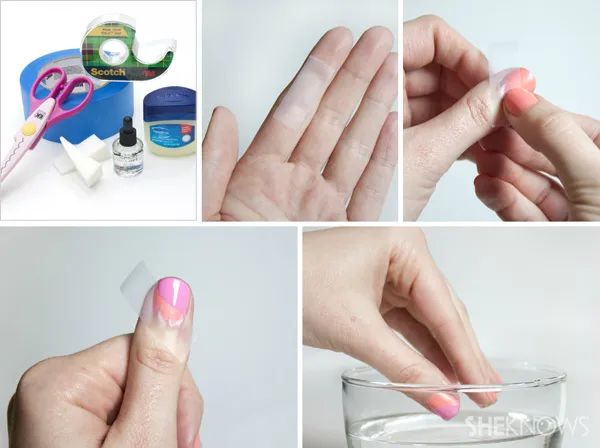
Before filing your nails, it’s important to properly prepare them first. Start by removing any old nail polish with a nail polish remover. Acetone-based removers work best for taking off stubborn polishes. Next, soak your nails in warm water for 5-10 minutes to soften and hydrate them. This makes filing easier and helps prevent nails from cracking or splitting. After soaking, gently push back your cuticles with a cuticle pusher or towel. Don’t cut your cuticles, as this can damage the nail bed. Pushing them back ensures they won’t get in the way while filing. Pat your nails dry with a towel before filing. Now your nails are prepped and ready for shaping!
According to wikiHow, removing old nail polish and soaking nails before filing helps soften them and prevents cracking and splitting. Pushing back cuticles also ensures they stay out of the way during the filing process.
Filing Tools
There are several different types of nail files to choose from including emery boards, metal files, glass files, and ceramic files. Emery boards are lightweight and inexpensive but tend to wear down quickly. Metal files are very durable but can be overly harsh on natural nails. Glass and ceramic nail files have risen in popularity due to their durability and gentleness on nails.
Nail files also come in varying levels of coarseness or grit. Lower grit numbers indicate a coarser, rougher file while higher grit numbers mean a finer, smoother file. Common grits for nail shaping include:
- 80-100 grit – Very coarse, used for shortening long nails
- 150 grit – Coarse, good for shaping and length
- 180 grit – Medium grit, ideal for general shaping
- 240+ grit – Fine grits, best for dryness, peeling, and natural nails
It’s best to use a coarser 100-150 grit file to shorten and shape the nail initially. Then smooth and refine the edges with a 180+ grit file. Always file in one direction, using gentle pressure. Seek to smooth the nail edge rather than aggressively filing away material.
Filing Techniques
When filing your nails, it’s important to use proper technique to avoid damaging the nails. Here are some key tips for filing nails correctly:
File in one direction – Always file nails by stroking the file from the outside edge towards the center of the nail in one direction. Sawing back and forth can cause nails to peel and split. Use gentle, even strokes in one direction for the best results.
Use gentle strokes – Don’t apply too much pressure when filing. Let the nail file do the work. Firm but gentle, even strokes are best to smooth nails without thinning them.
File from outside to center – Start filing from the outer corners of the nail, working inwards towards the center. Always file from the edges in, avoiding filing straight across the nail. This helps maintain the nail’s natural shape.
Proper filing technique helps shape nails evenly for a smooth look. By filing gently in one direction from the edges in, you can achieve a perfect shape without damage.
Shape Tips
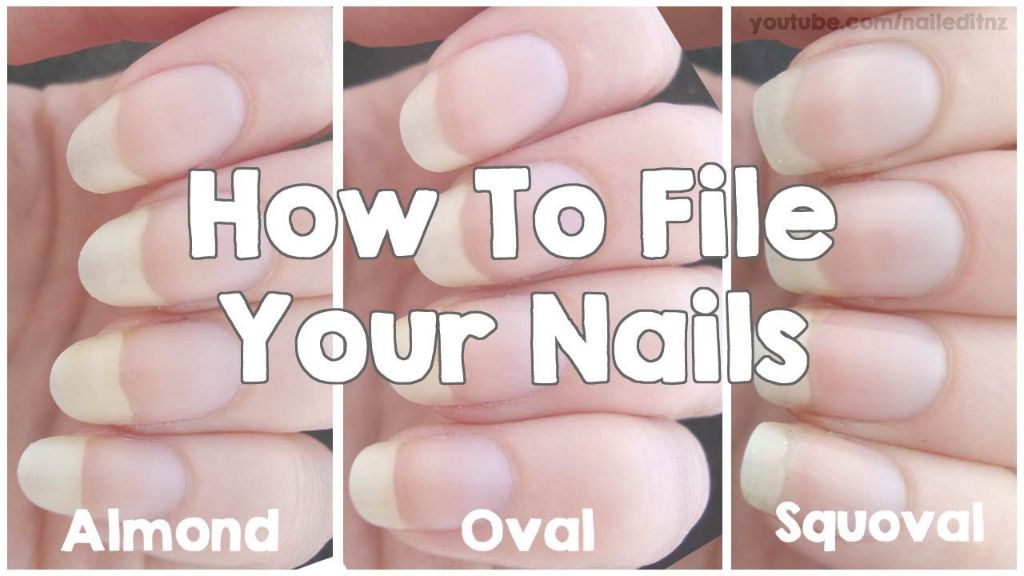
There are four popular nail tip shapes to consider when filing nails:
Square
Square nail tips have straight, 90-degree angles on the edges. This shape creates the illusion of longer nails. File the tips straight across in a square shape. According to The Ultimate Guide to Different Nail Shapes – Allure, square nails should be filed horizontally.
Round
Round nail tips have a curved edge that follows the natural shape of the fingernail. File the tips in a half-moon curve, rounding off any sharp edges or corners. As noted by 7 Popular Nail Shapes and Why to Choose or Avoid Them – Groupon, round nail tips should be filed in a U-shape.
Squoval
Squoval nail tips combine square and oval shapes. File the tips straight across while softly rounding the corners. According to The 5 Most Popular Acrylic Nail Shapes, Explained – Byrdie, sqovals should have a sharp, straight edge across the tip while curving the sides.
Coffin
Coffin-shaped nail tips are like squares but more elongated and with straighter side edges. File the tips straight across while keeping the sides straight without rounding. As The Ultimate Guide to Different Nail Shapes – Allure mentions, coffin nails should have straight lines on both the tip and sides.
Shape Sides
When shaping the nail sides, you can create straight, arched, or tapered sidewalls depending on your desired nail shape. To achieve straight sidewalls, use the flat side of the file and file straight back from the sides of the free edge to the cuticle area, alternating between both sides.Source
For arched sidewalls, angle the file and file the nail from side to center in a curved, arched shape rather than straight back. Use light, precise strokes to slowly taper the nail sides in. Be careful not to file too much off the sides or you’ll overly narrow the nail plate. Source Source
Tapered sidewalls are achieved by gradually angling the file to taper the width of the nail from base to tip. File the sides straight back initially, then begin to angle the file inward to taper the width on each stroke. Go slowly and be precise to avoid over-filing. Check for symmetry between both nails.Source
Set Length
When filing nails to your desired length, it’s important to keep all nails uniform in length across both hands for the most aesthetically pleasing look. According to grooming experts, the ideal nail length for men is to “leave at least a sliver of ‘white’ at the top of your nails” (source). For women, acrylic nail length is often a matter of personal preference, but a general rule is to keep nails at a functional length where they don’t interfere with daily activities (source).
To avoid breakage when growing out nails, file them into a gentle rounded or square shape rather than leaving them straight across. This helps take pressure off the corners and distributes force across the entire nail as it grows. Filing regularly in one direction starting from the outside edges can also help strengthen nails over time. Always file gently to avoid thin and peeling nails. The proper filing motion is both down and out toward the edge in long, gentle strokes. Setting a beautiful length takes patience, but with careful filing technique nails can safely reach impressive lengths.
Finishing Touches
After filing the main shape, it’s important to soften any sharp edges for a smooth finish. Use a finer grit file and gently smooth the edges along the sides and tips. Go lightly to avoid overfiling and maintain the shape (source).
Buffing the nails will help restore shine after filing. Use a buffing block in downward motions to polish the surface of each nail (source). This helps seal the edge of the nail plate for strength and gives an attractive shine.
Lastly, massage a drop of nail oil around the nail and cuticles of each finger. This hydrates the nail bed and cuticles, preventing painful tears or hangnails from filing. Look for nail oils containing jojoba, vitamin E, and essential oils for nourishing benefits (source).
Maintain Shape
Once you’ve achieved the perfect nail shape, maintaining it requires some regular upkeep. Here are some tips for keeping your nails looking shapely between full manicures:
Touch up filing every few days. Natural nails grow out and can lose their shape quickly. Use a nail file every 2-3 days to gently smooth edges and keep the shape crisp. Focus filing on the free edge and sides to preserve length. According to nailcarehq.com, “Regular gentle filing keeps nails smooth and eliminates the need to aggressively file into the nail plate.”
Keep nails hydrated. Nails are more prone to cracking, peeling and breakage when dehydrated. Apply cuticle oil daily and use a hydrating nail cream to keep nails flexible. The experts at Sianna recommend jojoba oil for natural nail hydration.
Don’t neglect cuticles. Keep cuticles pushed back and nourished to maintain a neat nail edge. Trim hangnails carefully with cuticle nippers. Massage in cuticle oil after cleansing hands or showering. Well-cared for cuticles prevent snagging that can compromise shape.
With some consistent upkeep, you can preserve a flawless, shapely nail edge between manicures. Don’t wait for chips and breaks before filing – a little proactive shaping maintenance goes a long way.
Conclusion
DIY nail filing provides a creative opportunity to shape and style your nails with precision and care. As outlined in this guide, proper tools, techniques, and patience are key. Filing in strokes from the outside corner inwards allows you to refine the shape. Curving the sides elegantly and setting a balanced length complete the look.
Filing your own nails enables you to customize your desired shape and length while saving time and money. The tips here equip you with the knowledge to file nails safely and achieve salon-worthy results. With some practice, filing can become a relaxing, rewarding ritual. After trying these techniques, you may find you prefer the artistry and personal touch of DIY nail shaping. Approach filing as a self-care experience and creative expression, and you may discover a new favorite hobby.
Now that you understand the steps for shaping flawless nails, it’s time to grab a file and give it a try. Filing your nails yourself can be empowering and fun. Be patient as you work to perfect the shape, keeping the proper nail anatomy in mind. In no time, you’ll have elegant nails to be proud of.