Diy Nail Art Pens: Customizing Your Colors
Nail art pens are a fun and creative way to customize the look of your nails. These pens allow you to freehand designs directly onto your nails in a variety of colors and finishes. With nail art pens, you can let your imagination run wild and create unique manicures that match any outfit or mood.
Compared to nail polish, nail art pens offer more control and precision when adding artistic details or designs to your nails. The fine tip applicator allows you to draw thin lines, dots, geometric shapes, and more. You can use pens to make simple accents or more complex full nail art.
Nail art pens come in many color varieties, from neutrals to bright neons. You can collect a spectrum of pens for limitless customization. The quick-drying formula means you can layer colors and not have to wait long between coats. Nail art pens make it easy to unleash your inner artist.
Types of Nail Art Pens
When starting DIY nail art, it’s important to have the right tools. There are various types of nail art pens available, each with a different purpose:
Striping Brush – This is a brush with a very fine point for painting thin, precise lines and stripes. The fine tip allows you to have maximum control for details (Source).
Dotting Tool – Dotting tools have a rounded point and are used to make perfect dots and circles. They come in different sizes so you can create different dot sizes (Source).
Corrector Pen – This pen has an angled tip for fixing mistakes and adjusting lines. The slanted tip allows you to scrape off polish easily.
Embellishment Picker – These have a wax-like, gummy tip for picking up and placing small rhinestones and embellishments.
Liner Brush – The liner brush has a precise point for painting on intricate, complex designs. This allows for very detailed nail art.
Having the right nail art pens makes it easier to create different effects and customize your manicures.
Choosing Colors
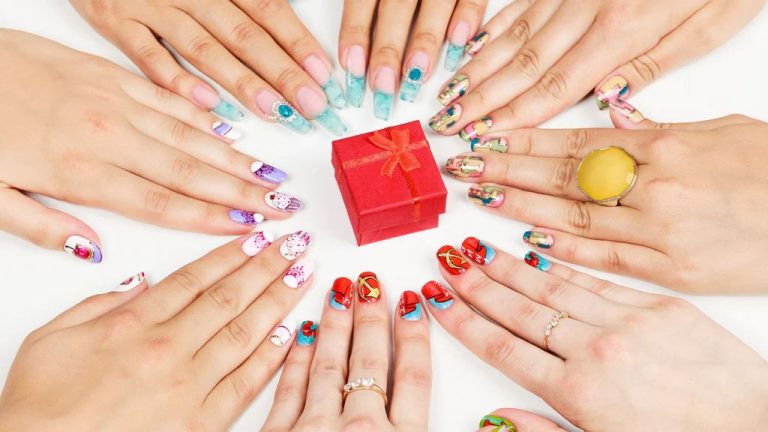
When selecting nail art pens, one of the most exciting parts is choosing from the wide variety of color options. Most sets come with 10 or more colors, ranging from basics like white, black, and nude to bolder hues like emerald, cobalt, and magenta. Having a spectrum to choose from allows you to get creative and make custom color combinations.
A key benefit of nail art pens is the ability to blend and mix colors to achieve new shades. For example, you can layer a red pen over a pink pen to get a coral hue. Or use a white pen as a base to make other colors pop. Combining two colors like yellow and blue makes a vibrant green. The possibilities are endless!
To decide which colors to choose, consider if you want to match your pens to existing polishes in your collection. Opt for versatile neutrals that go with everything, or pick vivid brights and metallics for maximum impact. You may also select seasonal shades that coordinate with upcoming events or holidays.
The most important tip is don’t limit yourself to just one or two pens. Take advantage of the range of color choices when selecting your nail art pens. Mix and match shades to invent custom, one-of-a-kind manicures!
Cleaning and Maintenance
Properly cleaning and maintaining your nail art pens is crucial for keeping them working their best. Here are some tips for cleaning, storage and care:
Use nail polish remover or alcohol to clean the nibs – soak the tip in remover/alcohol for 5-10 minutes then gently wipe clean (https://www.igelbeauty.com/blogs/product-tutorials/how-to-clean-nail-art-brushes-101). You can also use a stiff brush dipped in remover to scrub any dried polish off.
After cleaning, store the pens tip-down so gravity keeps the ink toward the nib and prevents drying out. Keeping them in an airtight container also helps prevent drying.
Don’t let polish dry on the nibs as dried acrylic is very difficult to remove. Try to clean within a few hours of use.
Replace nibs that become frayed or stop working. Many pens sell replacement nibs.
Don’t press too hard when using the pens as that can damage the nibs. Let the ink flow naturally.
Wipe off any excess ink on the barrels to prevent messes. Be careful not to get remover on the barrel as it can damage the finish.
Proper maintenance will keep your nail art pens working smoothly for a long time!
Basic Techniques
Nail art pens allow you to create some simple yet eye-catching designs on your nails. Here are some of the basic techniques you can use with nail art pens:
Striping
Striping involves creating stripes of different colors and thicknesses on the nails. Start with thinner stripes, then gradually make them thicker. You can do vertical, horizontal or diagonal stripes. For a fun look, alternate between thin and thick stripes (https://www.pinterest.com/kbugburba/nail-pens/).
Dots
Making different sized dots on the nails creates a playful polka-dot effect. Use the tip of the nail art pen to make tiny dots or press harder for larger dots. You can make organized rows of dots, or scatter them randomly for a funky look.
Lines
Draw straight lines across the nail in different directions. You can do single lines, double lines, intersecting lines, chevron patterns, or zigzag lines. Outline shapes with lines or fill them in to make geometric patterns.
Patterns
Use nail art pens to draw fun patterns like hearts, stars, flowers or animal prints. You can fill in the entire nail with a pattern for a bold look. Smaller patterns just on the tips or cuticles also look cute. Let your creativity run wild!
Advanced Techniques
Once you’ve mastered the basics, it’s time to take your nail art to the next level. Here are some advanced techniques to try with DIY nail art pens:
Gradients
Gradients create a blended, ombre effect across multiple nails. To achieve this look, start by painting the base color on all nails. Then use your nail art pen to draw diagonal lines, moving from dark to light. Blend the colors together using the brush end of the pen.
Florals
Flowers are a classic nail art motif. Outline flower petals with your nail art pen, then fill them in. Add leaves and stems for a full floral design. For multidimensional flowers, apply glossy topcoat over the flowers after filling them in.
Characters
Get creative with your nail art pens by painting miniature portraits and characters. Use fine-tipped pens to outline the features, then fill in details like eyes, noses, and lips. Add fun accessories, clothing, or backgrounds to complete your character designs.
Landscapes
Capture an entire landscape scene across your nails. Use nude and neutral tones as your base “sky” color. Then sketch hills, trees, buildings, and other details with contrasting colors. Add dimension by drawing both foreground and background elements.
Troubleshooting
Using DIY nail art pens allows you to get creative with custom nail designs, but mistakes and mishaps can happen, especially when you’re just starting out. Here are some tips for troubleshooting common issues with nail art pens:
Fixing smudges and bleeds – Nail polish can bleed or smudge if applied too thickly or before the previous layer has fully dried. Use a small brush dipped in nail polish remover to gently wipe away any smudges. Let each layer dry completely before moving on. Work in thin coats and don’t overload the bristles with too much polish.
Correcting mistakes – If you make a mistake, don’t panic. Wait for the polish to dry completely, then use a small brush or toothpick dipped in remover to fix errors. You can also use painter’s tape around the edges for a cleaner application. Working slowly and carefully will help minimize mistakes.
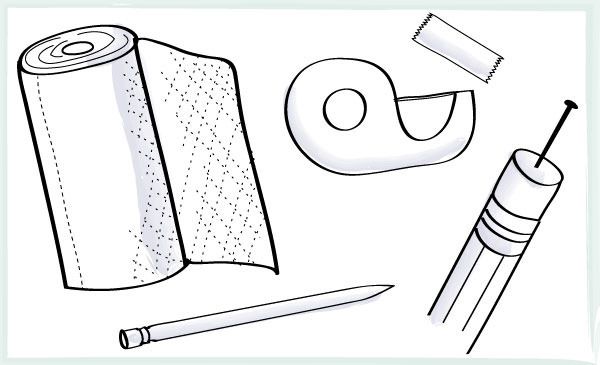
Dealing with a clogged or dry pen tip – Wipe off any excess polish from the tip using a paper towel or cloth. Store the pen tip-down to keep it moist. If clogged, roll a piece of scotch tape lightly around the tip to remove dried polish. Don’t press too hard or you may damage the tip.
Overall, patience and practice will help you handle common troubleshooting issues. Remember that mistakes can be fixed and are part of the learning process.
Inspiration and Ideas
When first starting out with nail art pens, it’s helpful to look at photos, videos, and tutorials for inspiration on designs you can create. There are many creative ideas online that can spark your imagination. For example, this YouTube video by Nail Career Education demonstrates 50 easy nail art designs using nail art pens. The tutorial shows step-by-step how to create various stripes, dots, shapes, and patterns.
Another great source of beginner nail art inspiration is this YouTube tutorial by Nail Art 101 which covers basic techniques for using nail art pens. They demonstrate easy ideas like ombre, marble, and abstract designs. Watching video tutorials can teach you skills and give you new creative ideas to try on your own nails.
There are endless nail art possibilities with pens. Look for inspiration online, experiment, and have fun expressing your creativity!
DIY Storage Solutions
Proper storage and organization is key to keeping your nail art pens and brushes in good condition. Investing in a holder or case can help protect your tools and make them easily accessible when inspiration strikes.
You can purchase affordable pen holders with multiple slots to neatly organize each nail art pen. For example, stores like AliExpress sell acrylic holders with 5 grids to hold various sized pens upright (Source: Nail Art Pen Holder). The grids keep each pen separate to prevent smudging or damage.
For brushes, look for soft cases that allow air circulation to dry bristles between uses. Or get creative and repurpose household items like cups or jars to hold brushes handle-down. Securing brushes prevents bending and maintains the optimal shape of the bristle tips. YouTuber Nailed It NZ recommends storing brushes handle-down in jars or reusable containers (Source: Nailed It NZ).
With some affordable finds and DIY solutions, you can keep your nail art tools protected and within easy reach for your next artistic endeavor.
Conclusion
Nail art pens allow for unlimited creativity and self-expression right at your fingertips. With some practice and experimentation, you can become your own nail art pro. While starting out with the basics, don’t be afraid to try new techniques and color combinations. Part of the fun is customizing designs that are uniquely you.
When using nail art pens, it’s helpful to keep some key tips in mind. Make sure to properly clean and store your pens after each use. Troubleshoot any issues like clogs or dried out pens. Find inspiration from nail art blogs and videos, but also let your inner artist shine. Take your time, have fun with it, and your DIY nail art designs will turn out fabulous.
Nail art pens open up an exciting new world of nail art possibilities. With a little creativity, you can make every manicure a mini masterpiece. So grab your favorite colors and start embellishing! The only limit is your imagination.