The Art Of Diy Nail Embellishments: Tips And Tricks
Nail embellishments allow you to customize your manicure and add some extra flair through the application of decorative stickers, glitter, gems, and more. While you can get basic polish changes at most salons, nail embellishments give you the chance to freely express your own unique style. Nail art has exploded in popularity in recent years thanks to social media, as people love sharing photos of their elaborate nail designs. From simple patterns to flashy 3D elements, nail embellishments let you change up your look whenever you please. The removable and temporary nature of these accessories makes them an appealing way to follow trends, celebrate seasons and holidays, or represent your interests and hobbies through your fingertips. If you’re looking to experiment with your style or enjoy creating arts and crafts, then exploring the world of DIY nail embellishments can be a fun and satisfying endeavor.
Types of Nail Embellishments
There are many types of embellishments that can be added to nails to create unique and eye-catching designs. Some of the most popular include:
Rhinestones are shiny decorative stones that come in various shapes and sizes. They can be glued onto nails and create a glamorous, sparkly look. Rhinestones are available in different colors like clear, silver, gold, rose gold etc. Small rhinestone studs or large statement rhinestones can both make beautiful accents on nails (Current Nail Trends: Most Popular Nail Styles in 2024).
Glitter nail polish and loose glitter flakes provide a fun and playful look. Chunky glitter or fine shimmery glitter polish can be worn alone or layered over other polishes. Loose glitter can be applied over wet polish or nail glue for extra sparkle.
Gems like pearls, crystals and jewelry charms add an elegant touch. Small gems can be clustered together or a few larger gems can make a statement. Jewelry charms like small stars, hearts, bows etc can be attached to nails with glue or nail jewelry findings.
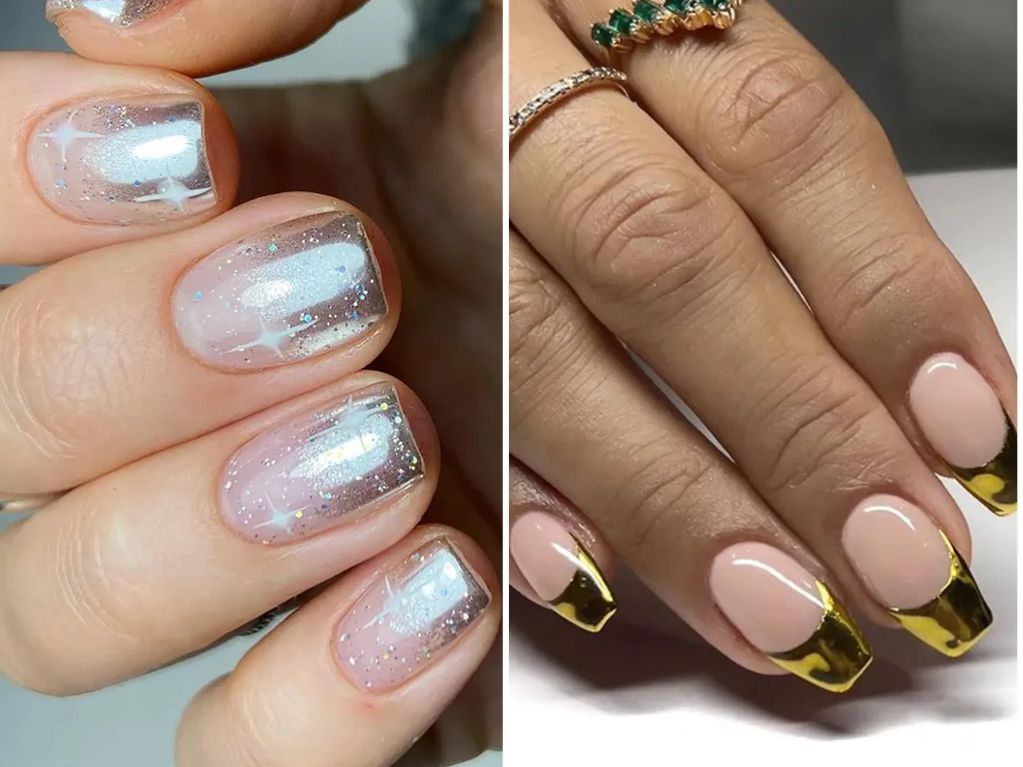
Foil sheets are available in different metallic colors like gold, silver, rose gold etc. Small foil pieces can be cut and applied on nails with an adhesive for a trendy chrome effect. Foil gel polish is also available to get the foil look without using actual foil.
Choosing Embellishments
When selecting nail embellishments, it’s important to consider the occasion and nail shape you are decorating. For a formal event like a wedding or prom, smaller embellishments in neutral or metallic tones work well. Rhinestones, pearls, and small studs complement the elegance of a formal look. For more casual everyday wear, brighter colors and bolder shapes are fun.
The nail’s shape also impacts what embellishments to use. On round nail tips, large centered rhinestones or floral motifs look great. For square or squoval nails, you can align rows of rhinestones or clusters of studs. On almond and coffin-shaped nails, cascading crystals flowing from the tip downwards are beautiful. Avoid embellishments that overhang the nail, as they risk snagging and popping off.
When in doubt, minimalism and strategic placement help embellishments suit any occasion. Focus on one or two fingers for an accent nail, or use embellishments to highlight the ring finger. The thumb and pointer fingers also nicely draw attention. Leave the other nails clean for balance. Spread out embellishments, rather than clustering too many per nail. This allows each piece to shine.
Where to Buy Supplies
Embellishments and other nail art supplies can be found at specialty beauty stores, craft and hobby shops, and online retailers. Here are some places to look:
Beauty Supply Stores – Stores like Sally Beauty, Ulta Beauty, and Sephora have aisles dedicated to nail art and embellishments. You’ll find everything from rhinestones and charms to glitter and decals. The selection is expansive and the prices are reasonable.
Craft Stores – Check the jewelry making section at stores like Michaels and Jo-Ann Fabrics for gems, charms, chains, and other embellishments perfect for nails. You can often find coupons and sales on these items.
Online Retailers – Websites like Etsy, eBay, and Amazon have thousands of nail art products. Search for “nail embellishments” or more specific terms. Online shopping allows you to browse a huge selection in one place and have supplies shipped to your door.
The best places to shop offer a wide variety of embellishments at affordable prices. Take advantage of sales and coupons when possible. Having a stocked supply of rhinestones, charms, glitter, and more will make creating custom nail art a breeze.
Tools and Adhesives
The right tools and adhesives are essential for applying nail embellishments smoothly and securely. Here are some of the key supplies you’ll need:
For adhesive, nail glue is the best option. Look for glue specifically formulated for nail art, as it will dry quickly and adhere embellishments tightly. Clear nail glue dries invisible while colored glues like red or dark can show through transparent embellishments. You’ll also need glue applicators like tiny brushes or dotting tools to apply precise amounts of glue.
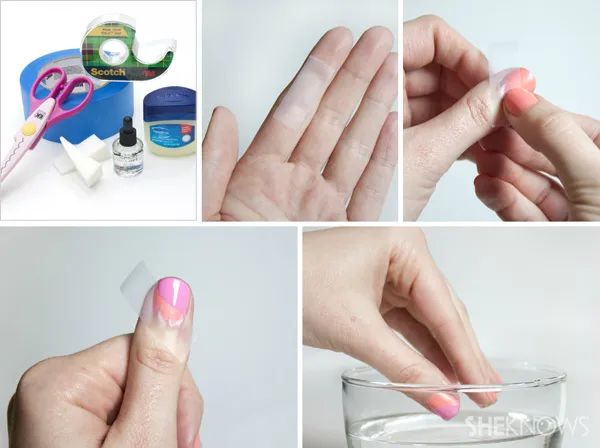
Tape can also help when applying small or fiddly embellishments. Use strips of masking tape to temporarily hold pieces in place while the glue dries. Tweezers may also be helpful for picking up tiny gems or charms.
Curing lights and UV lamps speed up the drying process for UV-cured gel polishes and adhesives. Some embellishments like foil flakes also adhere better with heat, so a mini heat gun can help melt them onto the nails.
Lastly, have nail art clean-up brushes on hand so you can neatly wipe away any excess glue or fix small mistakes.
Prepping and Cleaning Nails
Properly prepping and cleaning your nails is an essential first step before applying any nail embellishments. This process removes oils, debris, and shine from the nail surface so embellishments can adhere properly.
Start by filing and shaping your nails into your desired length and shape using an emery board. File in one direction starting from the outside corner of the nail towards the center. Be sure to use a light hand, avoiding over-filing which can thin and weaken nails (source).
Next, use a buffer block to gently buff the surface of each nail until smooth and matte. Buffing removes shine and slight surface imperfections for better embellishment adhesion. Always buff nails in one direction using light pressure (source).
Then, use cuticle clippers or pushers to gently push back and trim any overgrown cuticles, which can prevent embellishments from seating flush against the nail. Avoid cutting living cuticle tissue, as this can lead to infection (source).
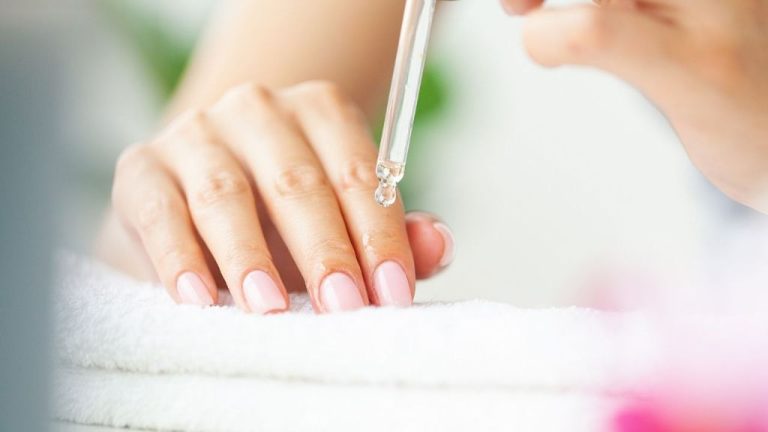
Finally, use a dehydrator or nail primer to remove any remaining oils and moisture. This leaves nails perfectly clean and prepped for embellishment application.
Applying Embellishments
Applying nail embellishments takes some practice, but following these step-by-step instructions will help you get the hang of it.
First, make sure your nails are clean and free of oils. Prep your nails with a base coat to help the embellishments adhere better. Then apply your base color, whether regular nail polish or gel polish.
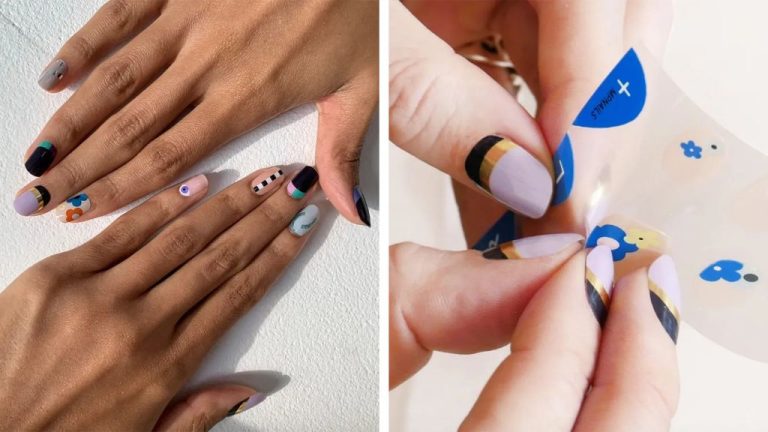
Before applying embellishments, decide on the design you want. Play around with placement before adhering them. Make sure to leave room between each embellishment.
Using a pair of tweezers, pick up each embellishment and dip it into the nail glue or adhesive. Apply a very small amount of glue – you don’t want it oozing out.
Carefully place the embellishment where you want it on your nail. Gently press down for about 10 seconds until it sets. Be very precise with placement – once it’s set, embellishments are hard to reposition.
Finish by sealing everything with a layer of clear topcoat. This helps smooth any edges and give a uniform finish. Let your nails fully dry before doing anything with your hands. Drying time depends on the products used.
With practice, you’ll get better at applying embellishments quickly and neatly. Go slowly at first. Remember to seal the free edge with topcoat to avoid lifting.
For more tips, check out this helpful video tutorial on applying and securing nail art charms.
Curing and Drying
Proper drying time is crucial for nail embellishments to adhere properly and last. According to Martha Stewart, nail polish can take 1-2 hours to fully cure, especially if using multiple coats. For glue and adhesives, drying time can vary based on the product but most recommend letting glue fully dry for at least 10-15 minutes before touching the nails to ensure a strong hold.
Be patient and allow each layer – base coat, polish, embellishments, and top coat – to dry completely before moving to the next step. Trying to rush the process can cause embellishments to detach or get smudged by the next layer. If using quick-dry top coats or nail dryers, check the product instructions as they may shorten the wait time between steps. No matter what products are used, a full nail embellishment look will likely need 60-90 minutes minimum to fully cure before considering the manicure finished.
Removal and Reuse
When you’re ready to remove your nail embellishments, it’s important to take care not to damage them so they can be reused. The safest way to remove embellishments is by soaking them off. Fill a bowl with pure acetone and submerge your nails for 10-15 minutes. This allows the adhesive beneath the embellishments to fully dissolve so they can be gently lifted off. Avoid using tools like tweezers or scrapers to pry off embellishments as this can cause them to crack or break.
According to nail expert Paola Poncé (https://paolaponcenails.com/how-to-safely-remove-3d-nail-charms-2-mistakes-to-avoid/), once the embellishments are removed, make sure to thoroughly clean off any remaining adhesive before storing them for later use. This prevents them from getting stuck together. Store embellishments in sealed containers or bags to keep them from getting dusty or dirty between uses.
With proper removal and storage techniques, most nail embellishments like rhinestones, charms, gems, glitter and more can be reused multiple times. Taking good care of your embellishments saves money since you don’t have to constantly buy new supplies.
Inspiration and Ideas
Nail art embellishments allow for endless creativity and self-expression. Browsing photos of embellished nail designs can provide inspiration for your own unique looks. Sources like Pinterest have hundreds of photos showcasing embellished nail art in every color and style imaginable.
Some creative ideas for embellished nails include:
- Glittery nails with rhinestones, beads, or charms
- Metallic chrome nails with studs or spikes
- Floral designs with faux flowers and pearls
- Geometric or abstract patters with metallic tape
- Ombre nails with colorful rhinestone gradients
The options are endless when it comes to decorating nails with embellishments. Look to photos online for inspiration on color combinations, patterns, and styles that appeal to your personal taste. Sites like Pinterest have hundreds of ideas to ignite your creativity.